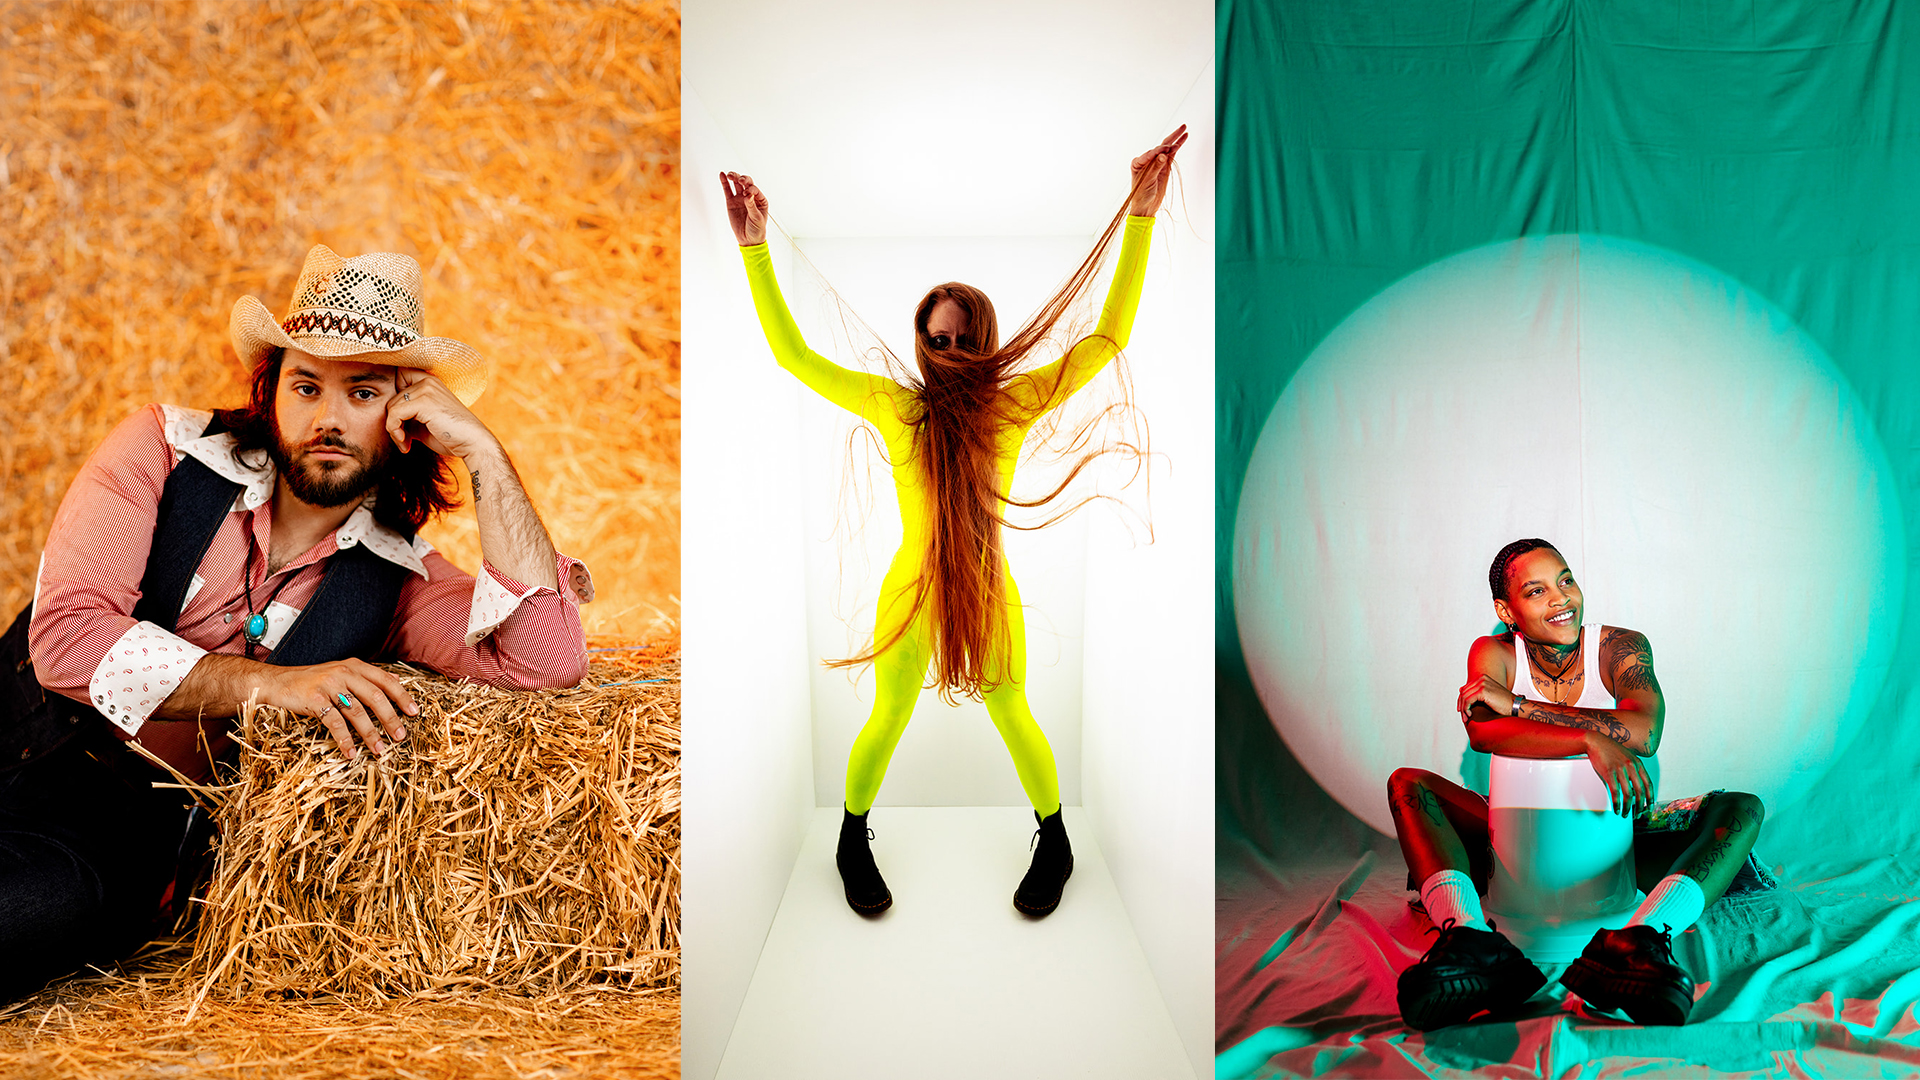

This set started from a place I know really well. Feeling creatively stuck.
We love building box sets, but we were starting to feel uninspired. We kept asking ourselves the same question over and over. How can we change things up?
That question turned into this set.
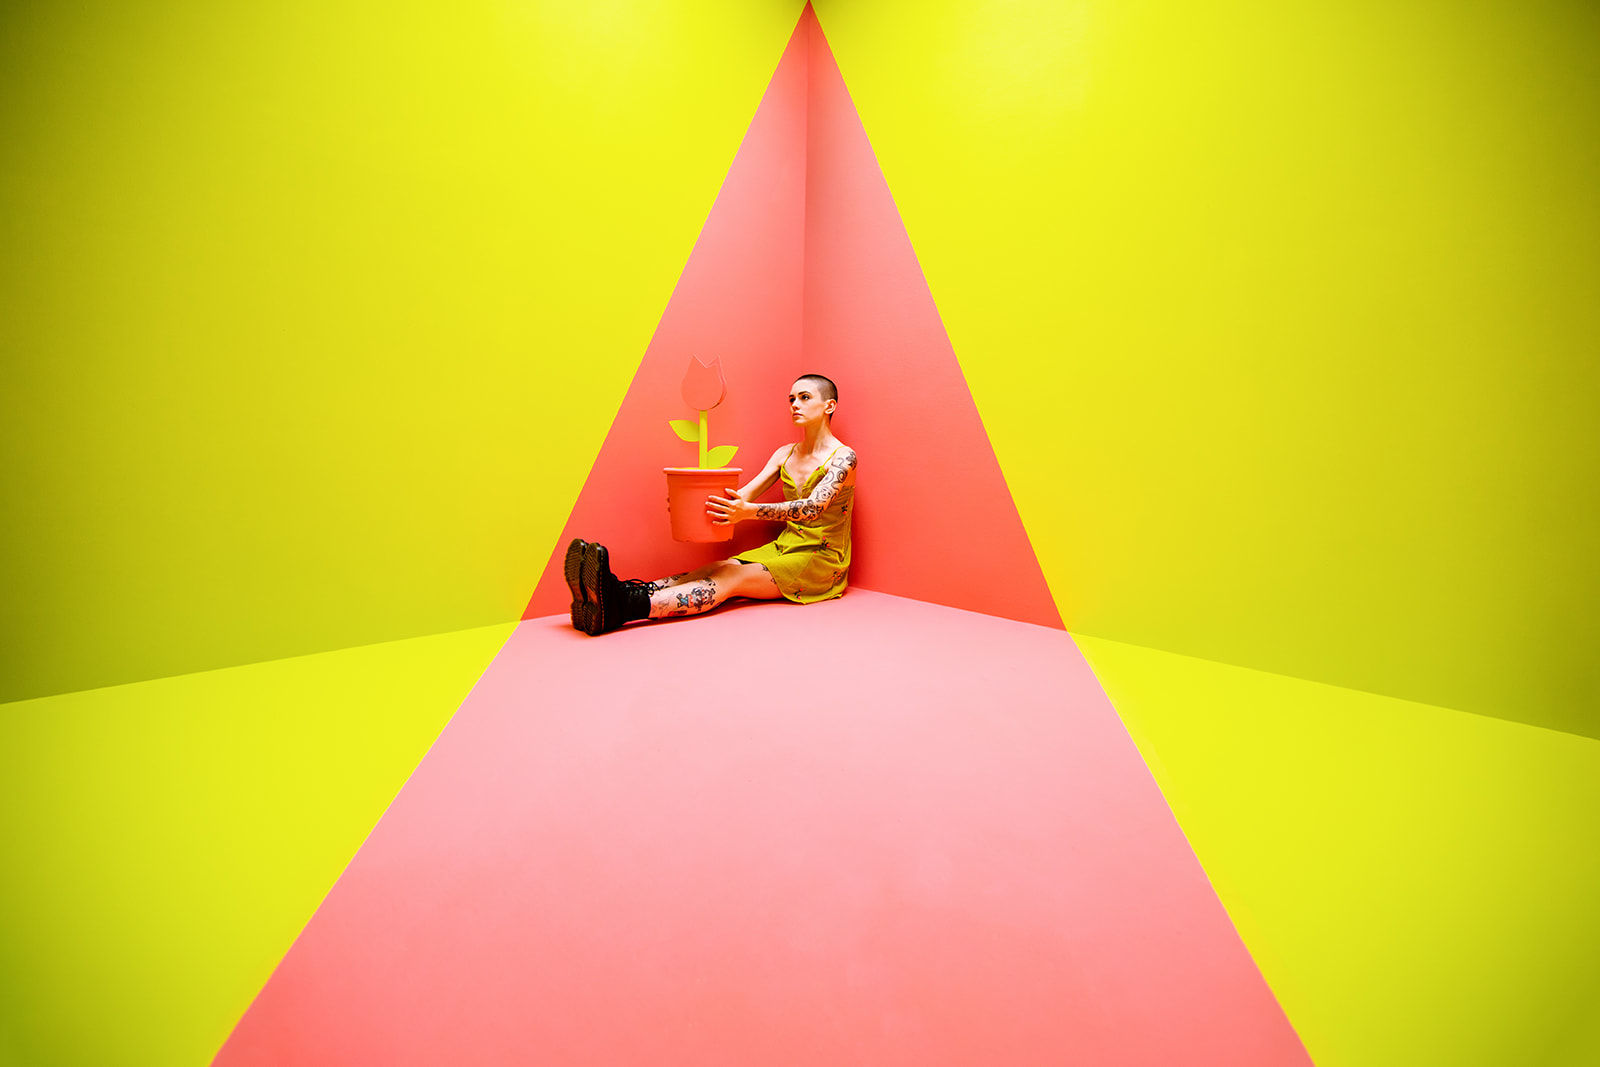
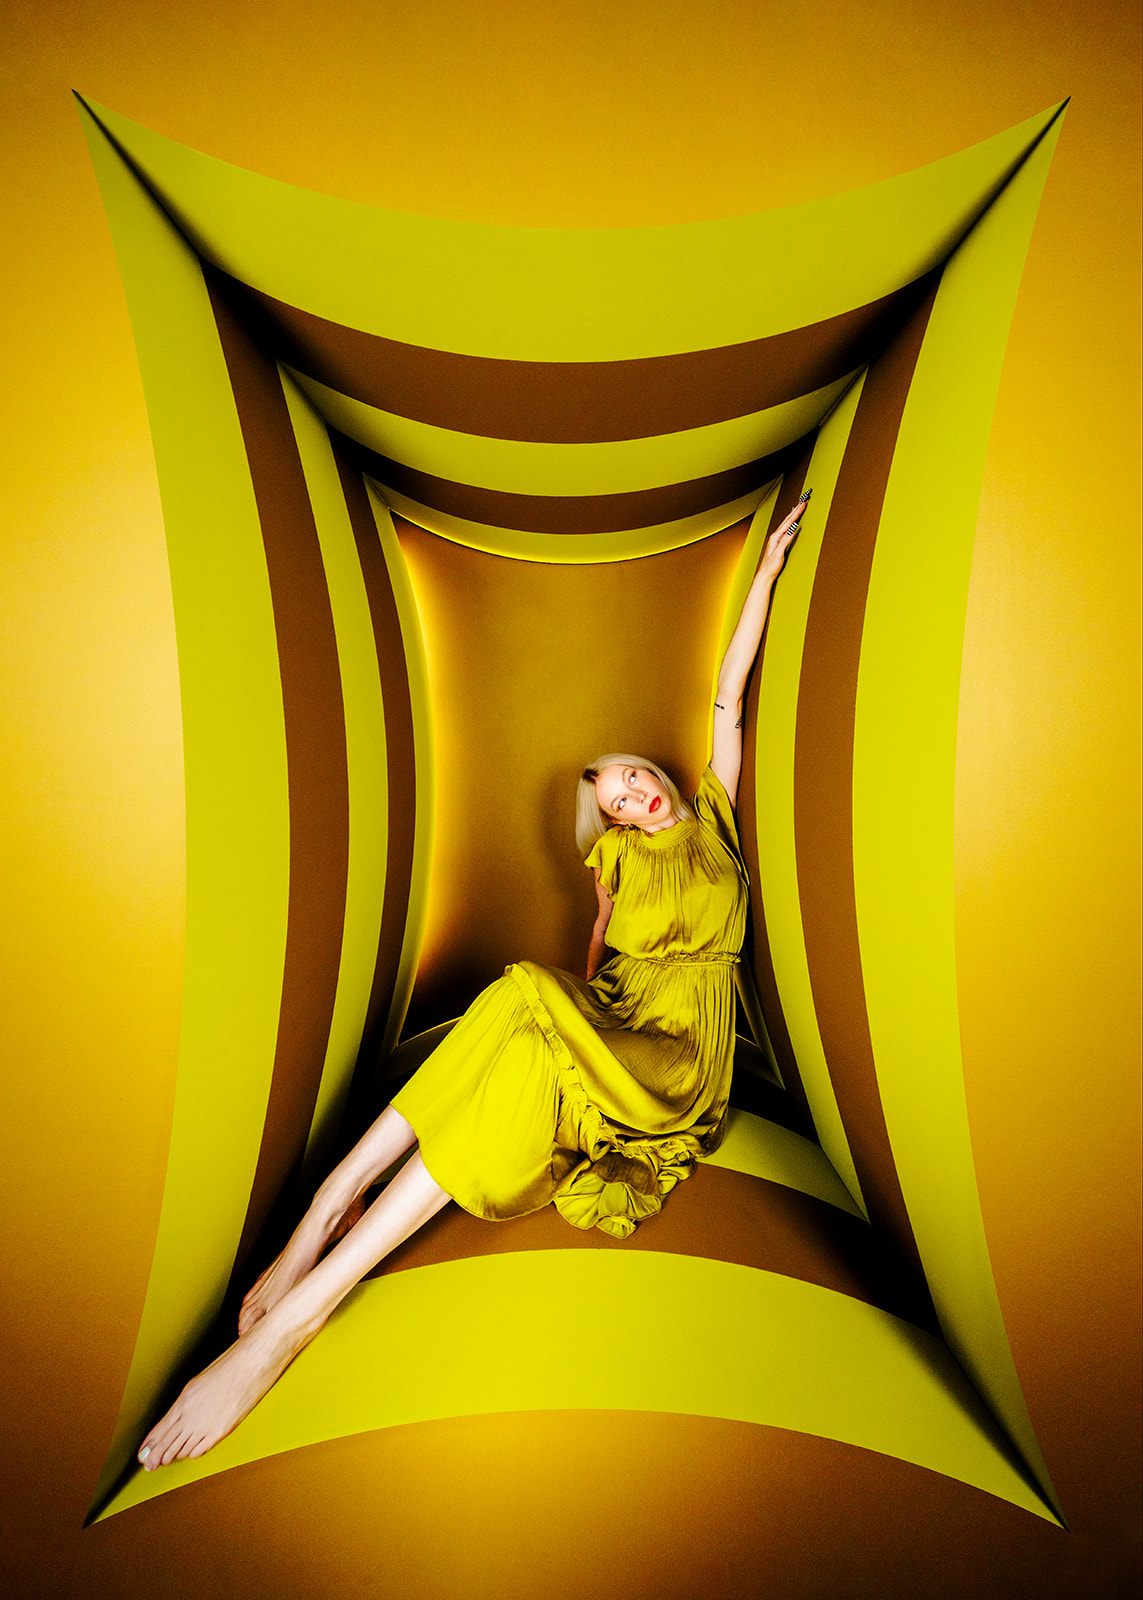
David started thinking about what it would look like if the walls warped inward. So it was still a box set, but a warped wall box set. Almost like the space was squeezing the subject.
He sketched it out and we were immediately obsessed. He jumped into Illustrator to dial in the curves and started thinking through how to actually make it real.
That part is always where things get interesting.
Designing and Building the Warped Structure
The original plan was to CNC the walls, but our CNC only cuts up to 29 inches long, and these walls needed to be much longer. We went through a lot of “what if” options before landing on a hybrid solution.

David CNC cut the structural pieces and then laser cut gussets on our xTool S1 to connect everything together. It was one of those builds where nothing was hard on its own, but the repetition and number of pieces really added up.
And then came the bendy plywood.
If you’ve never worked with bendy ply, it’s basically luan with the grain all running the same direction so it can curve. The floor was the hardest part because it needed to bend and also support the weight of a model, which meant a lot of internal bracing.
Once the walls, floor, and ceiling were all assembled, we both had that moment where you step back and go… oh. This is actually working.
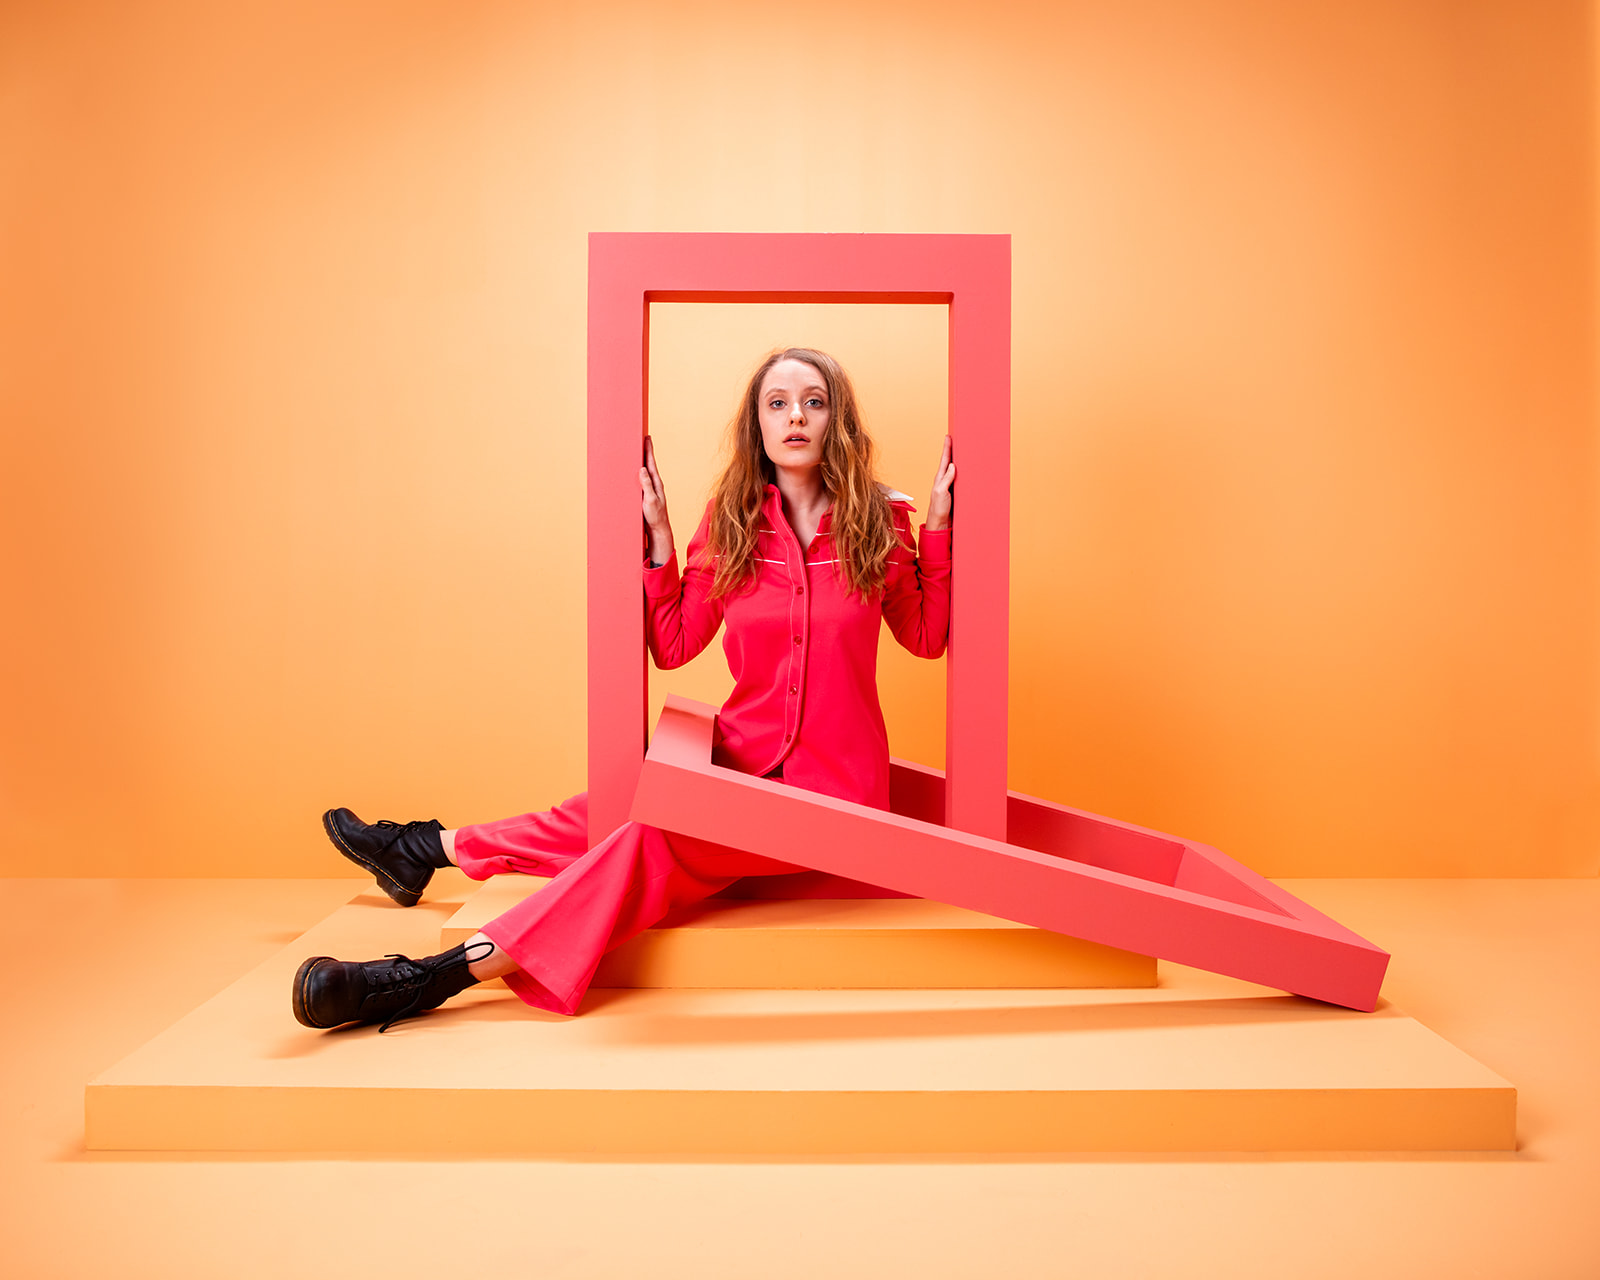
Color, Tension, and Stripes
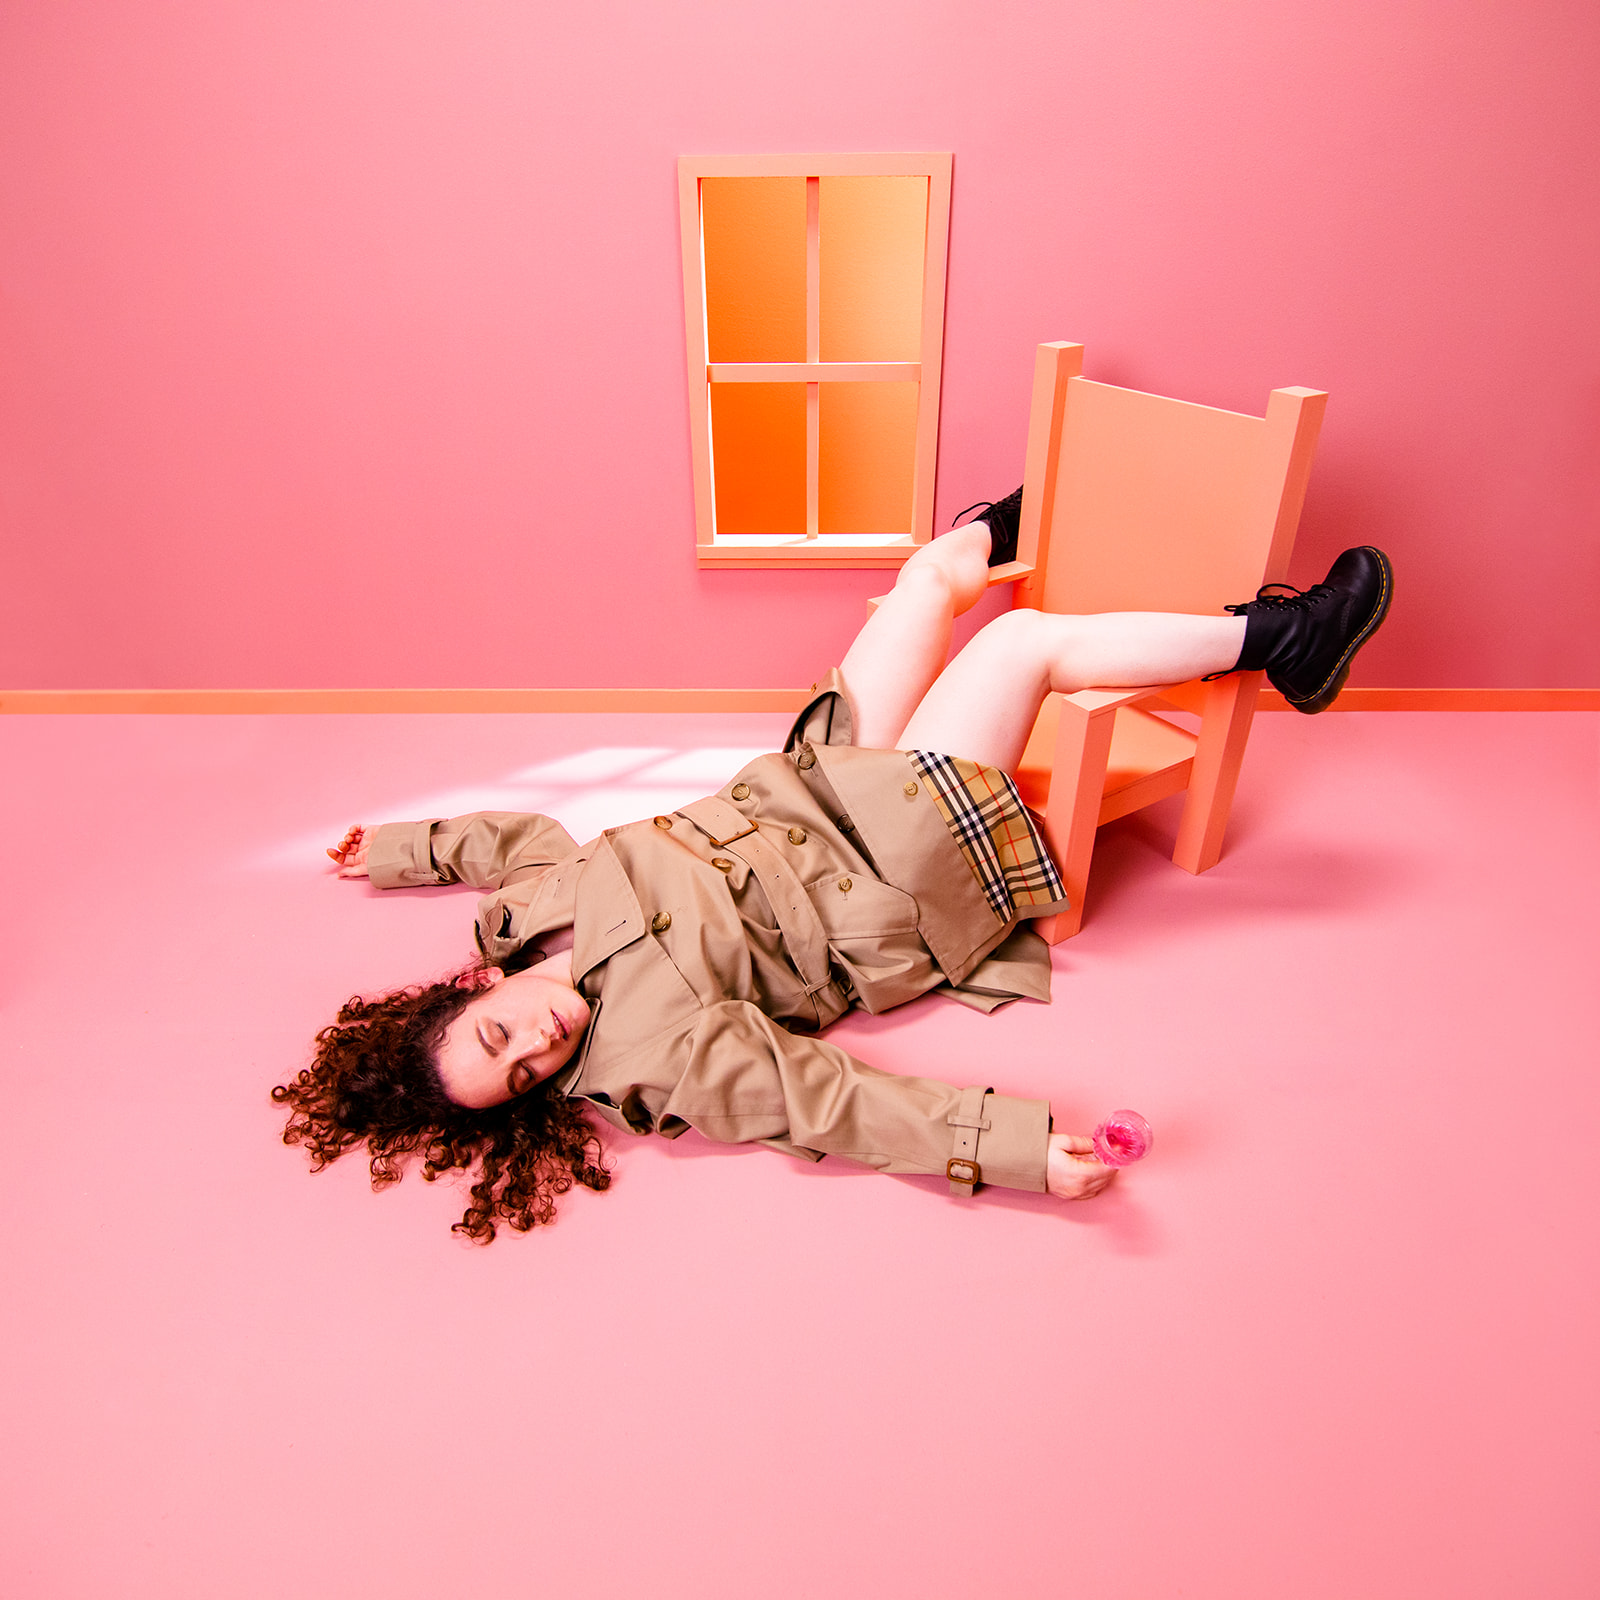
The color choice came from a thrifted dress we found. That yellow-green color we always argue about. Is it yellow? Is it green? The tension in that color felt perfect for the concept of the shoot.
At the paint store, I spotted a gold paint that paired so well with it that we instantly spiraled into a new obsession. You can just buy gold paint. Wild.
Originally, the plan was to keep things simple, but I really wanted to add stripes. I wanted as many leading lines as possible to exaggerate the curves of the set and pull everything inward.
I’ll be honest, striping is tedious. Measuring, taping, re-measuring. But slowing down and committing to that detail made such a difference in the final result.
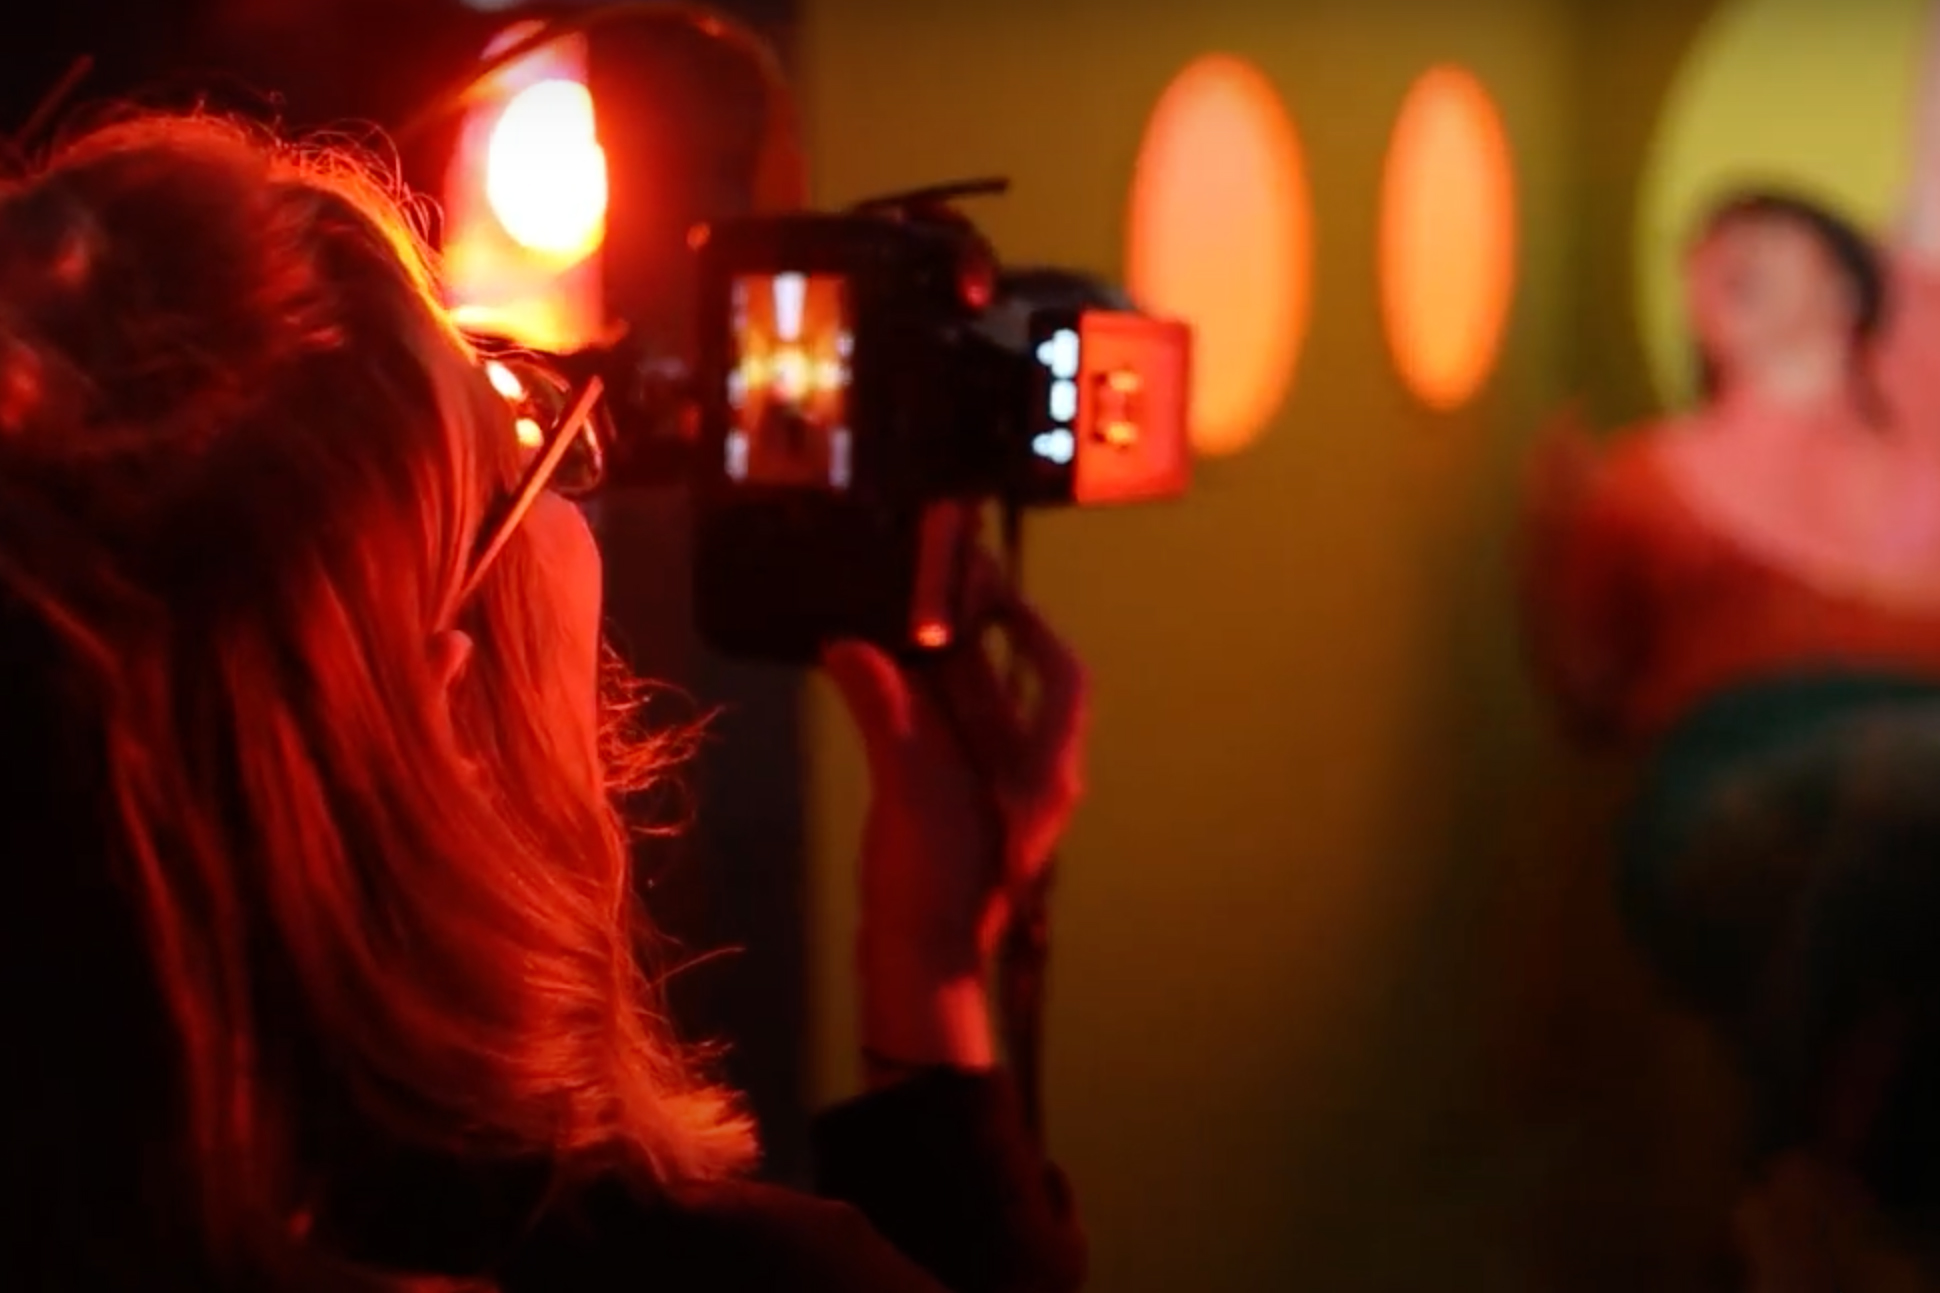
Lighting and Shooting Inside the Space
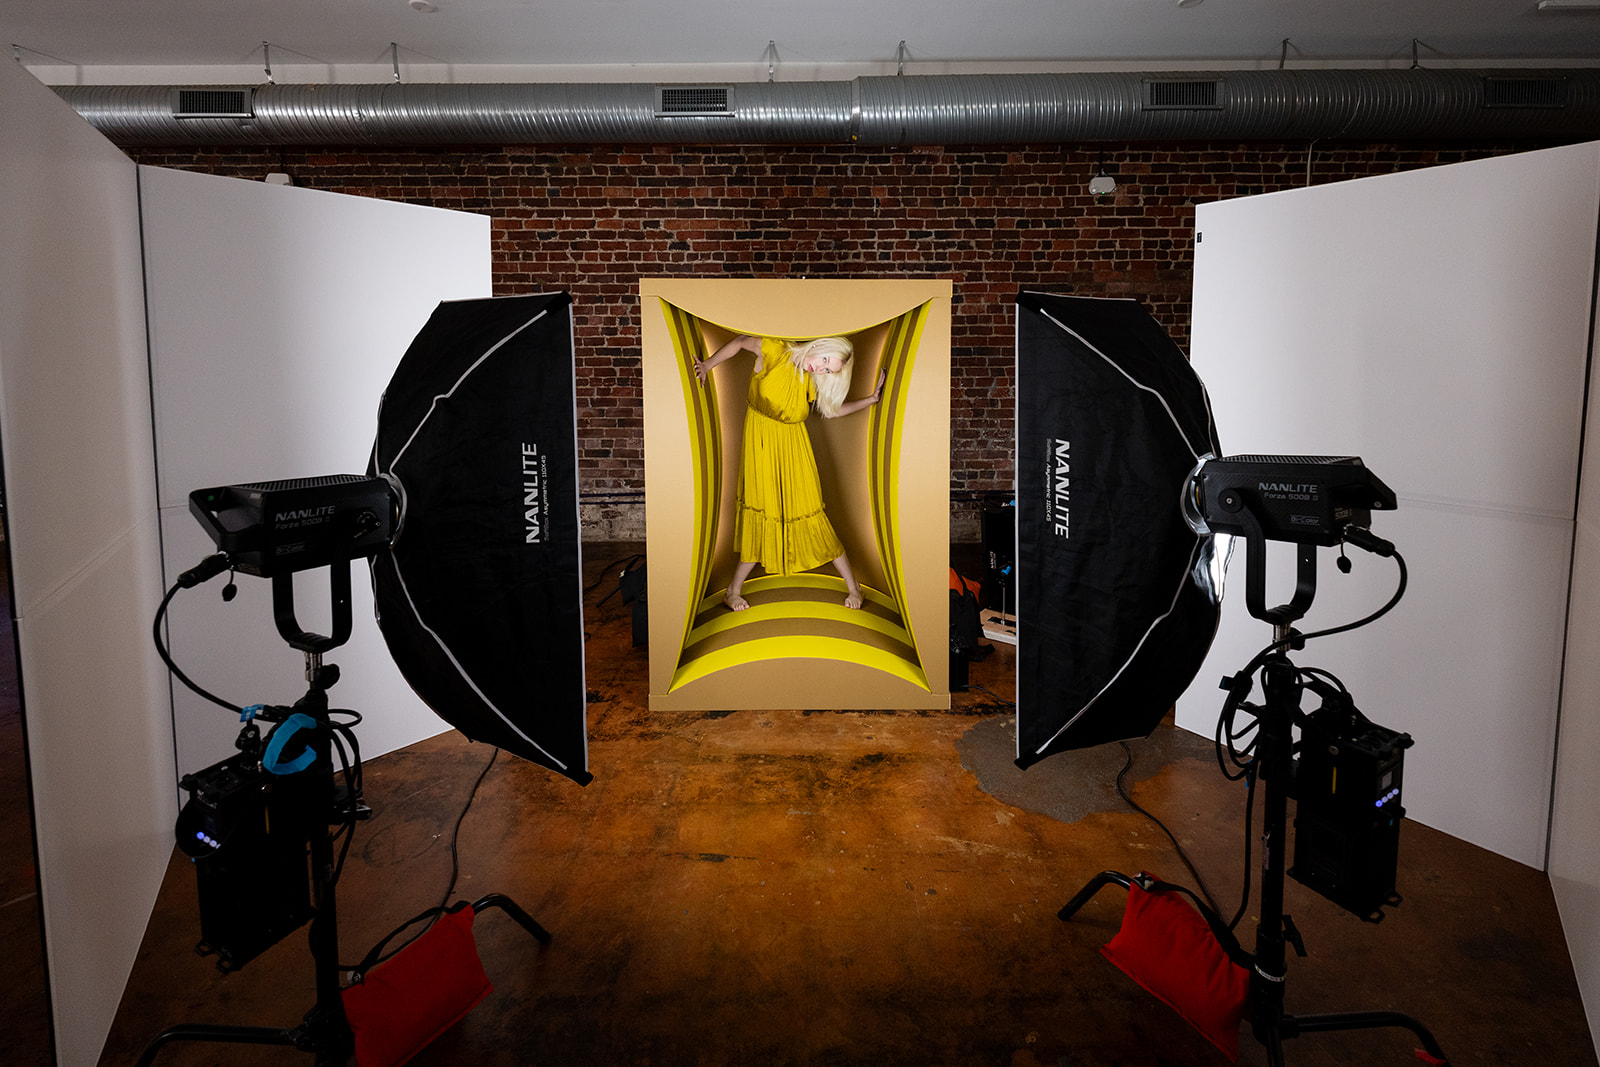
David lit this set a little differently than usual. He created a small gap behind the back wall and pushed light through it to add a subtle glow, then blasted the rest of the set with a high-key setup using softboxes and Nanlite lights. --you can view more of our setup here.
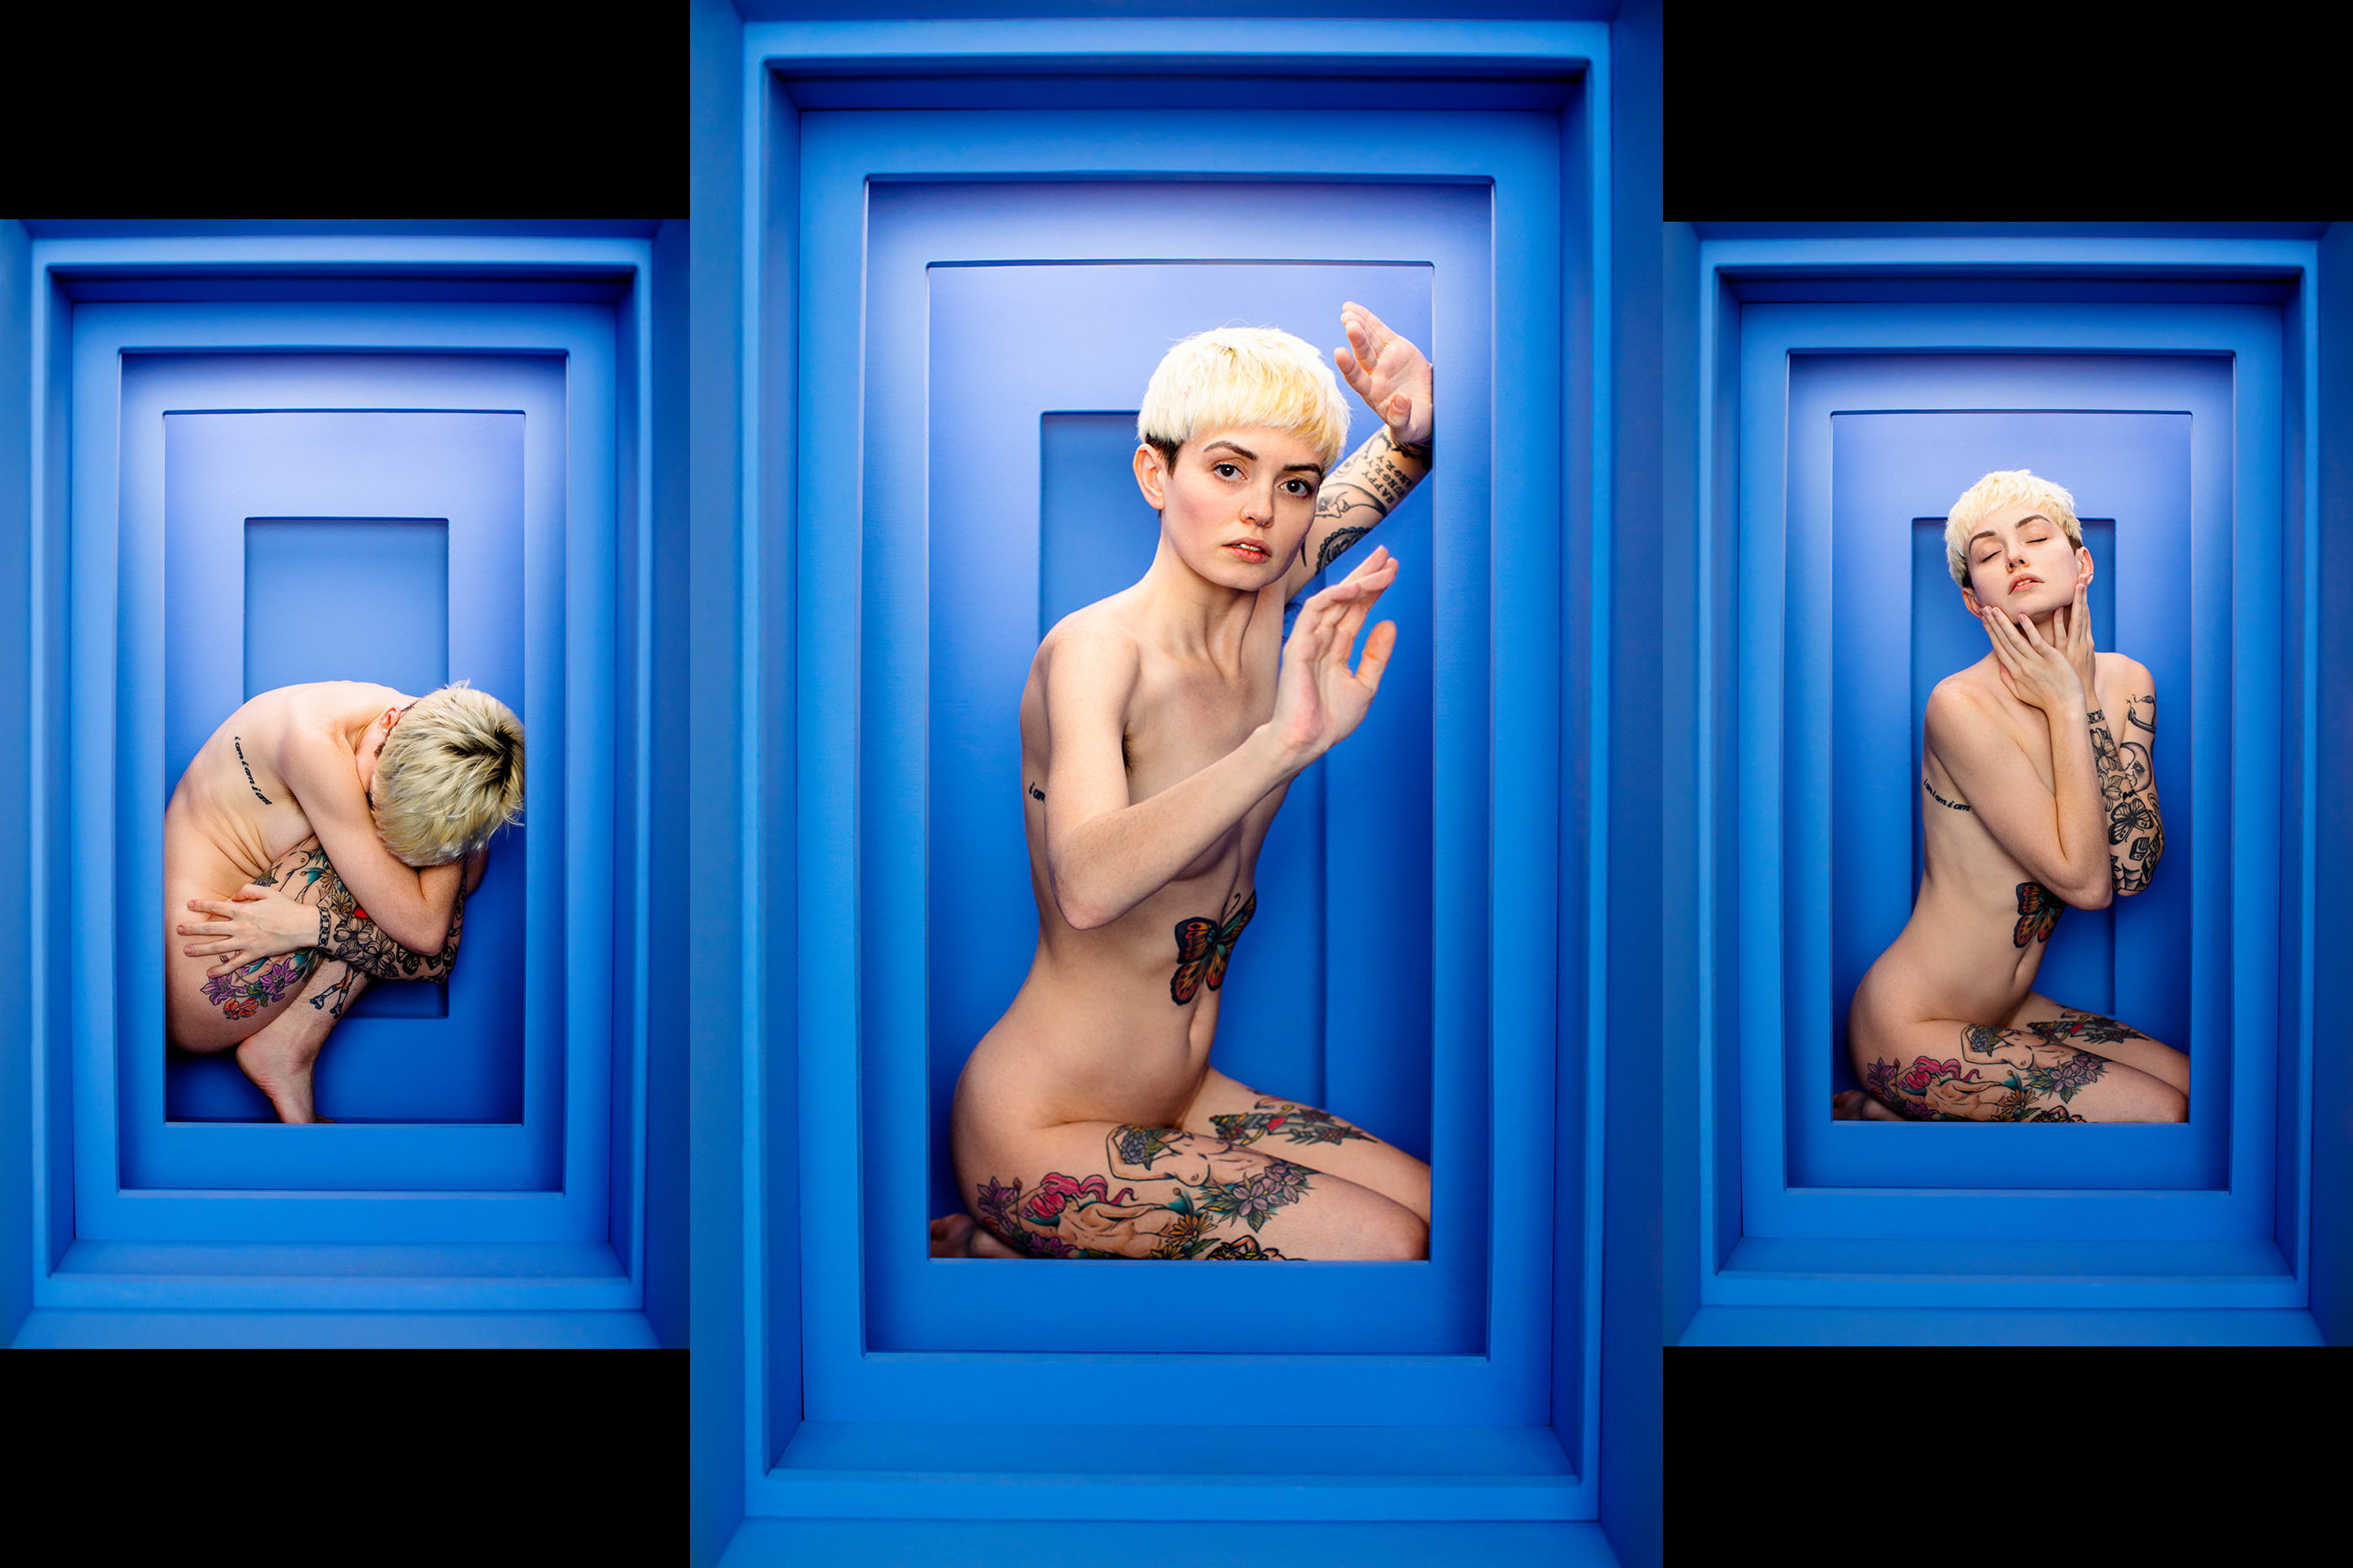
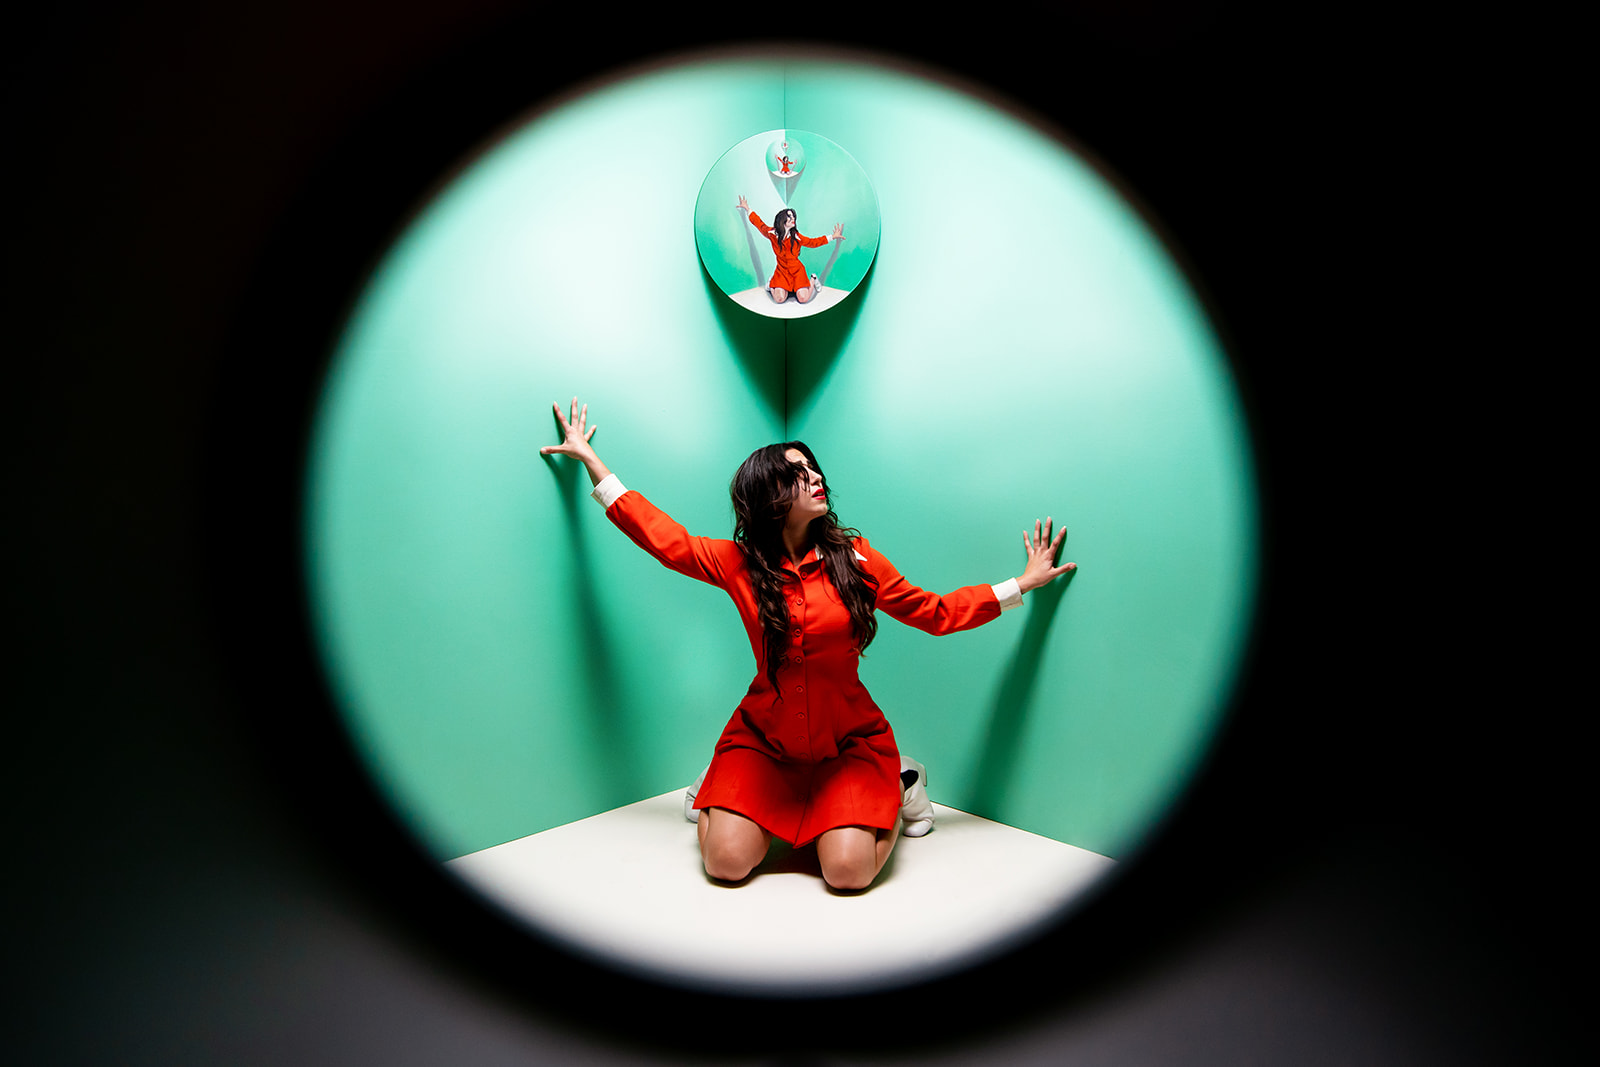
Once the model arrived and stepped into the set, everything changed.
Being inside that space is disorienting. The walls feel like they’re coming in. The floor curves up. Holding even a basic pose becomes difficult. That physical discomfort became part of the story.
The concept of the shoot centered around control. How spaces and situations force us to adjust ourselves. How pressure builds slowly until you feel panicky without realizing why.
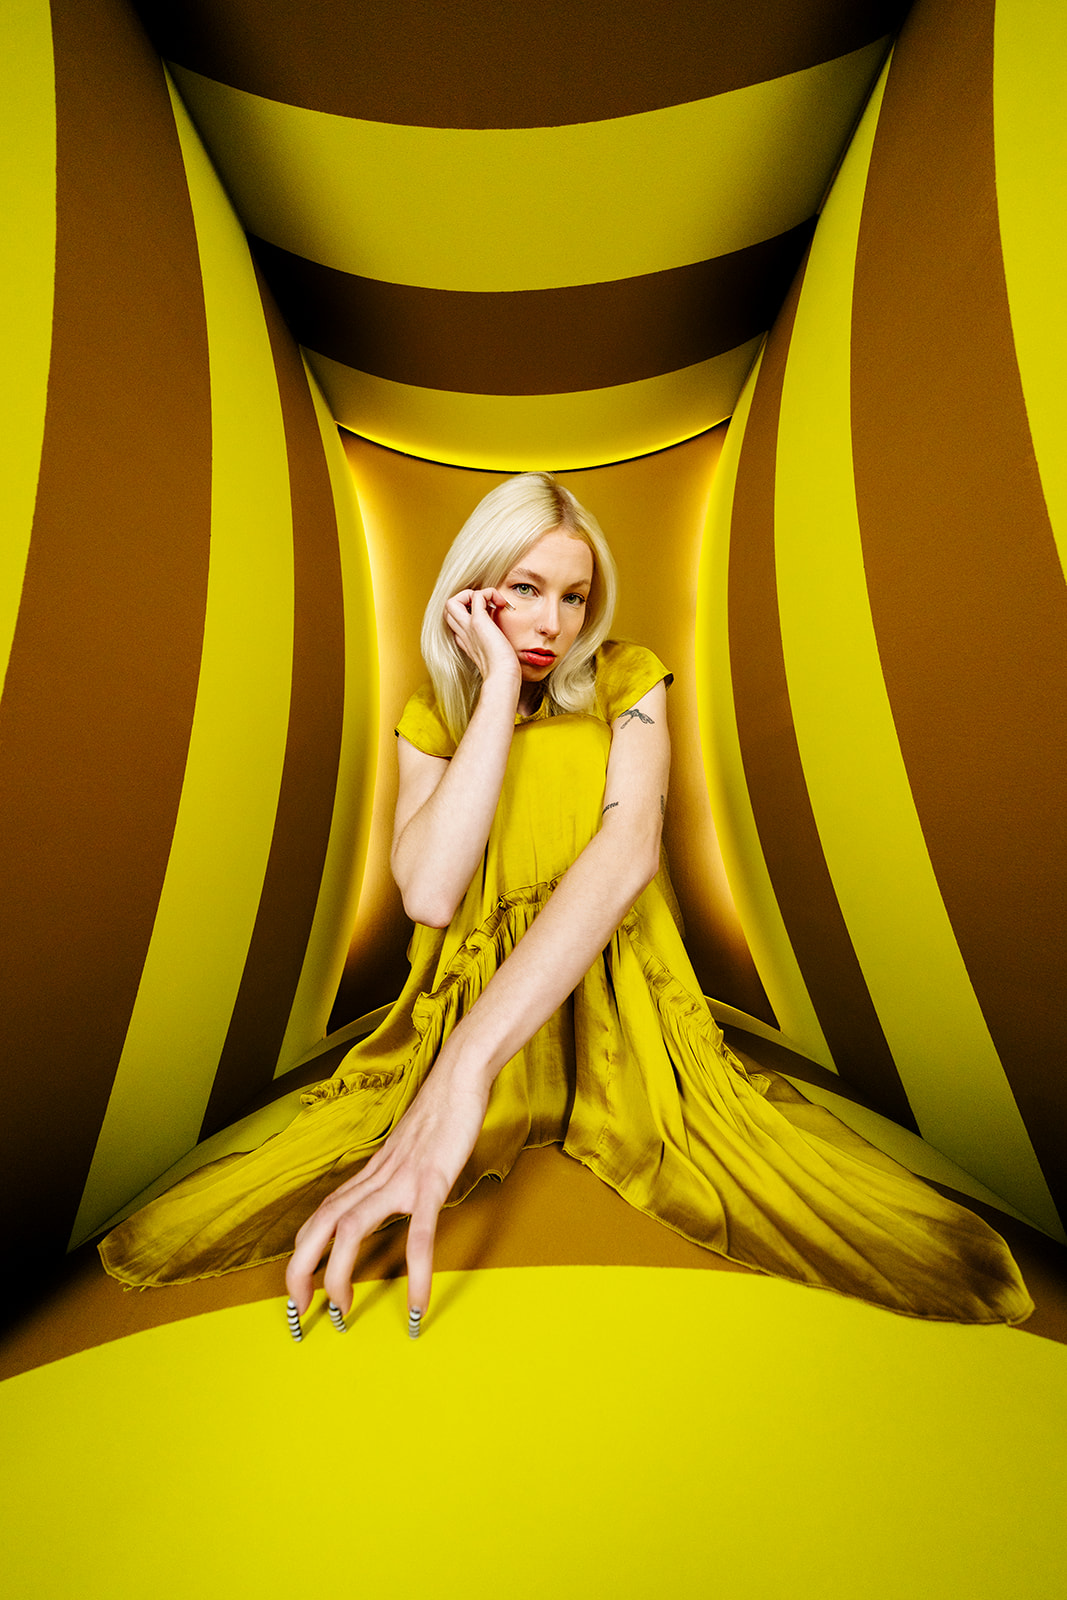
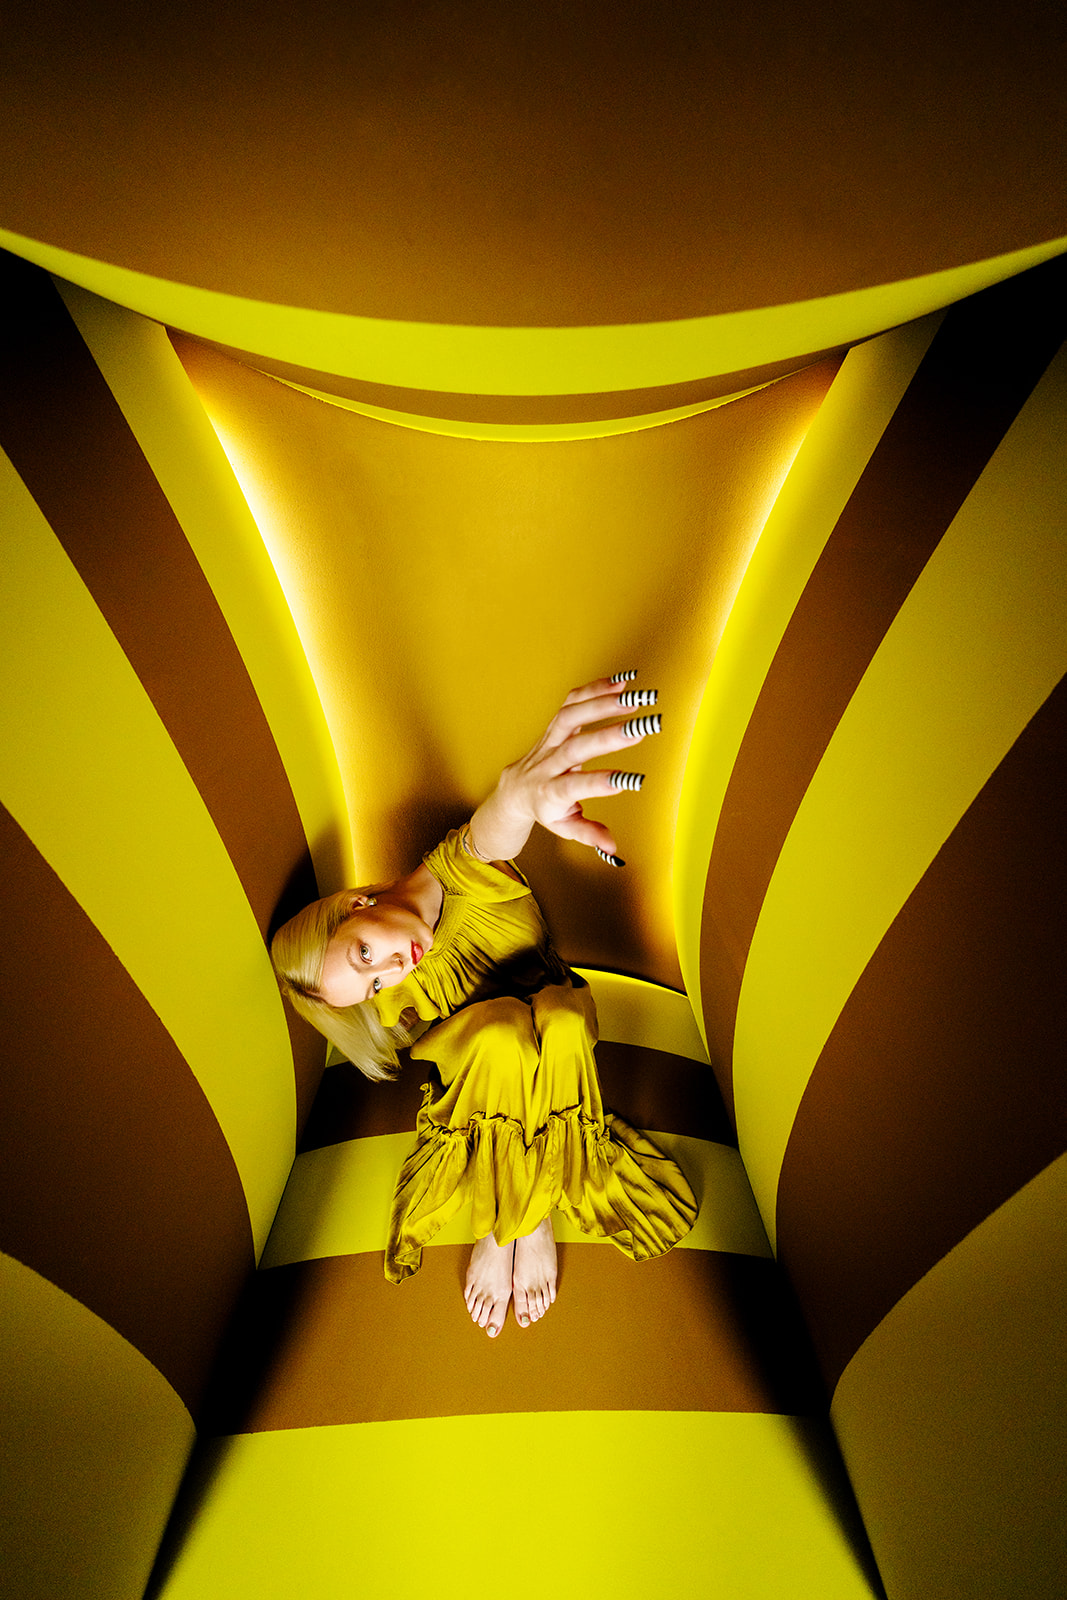
We started with simple poses to let our model warm up and to help us understand how bodies interacted with the curves. Then things escalated. More tension. More distortion. More emotion.
Shooting with the Canon RF 10–20mm lens exaggerated everything in the best way. It stretches the scene without fisheye distortion, which made the walls feel longer and more oppressive.
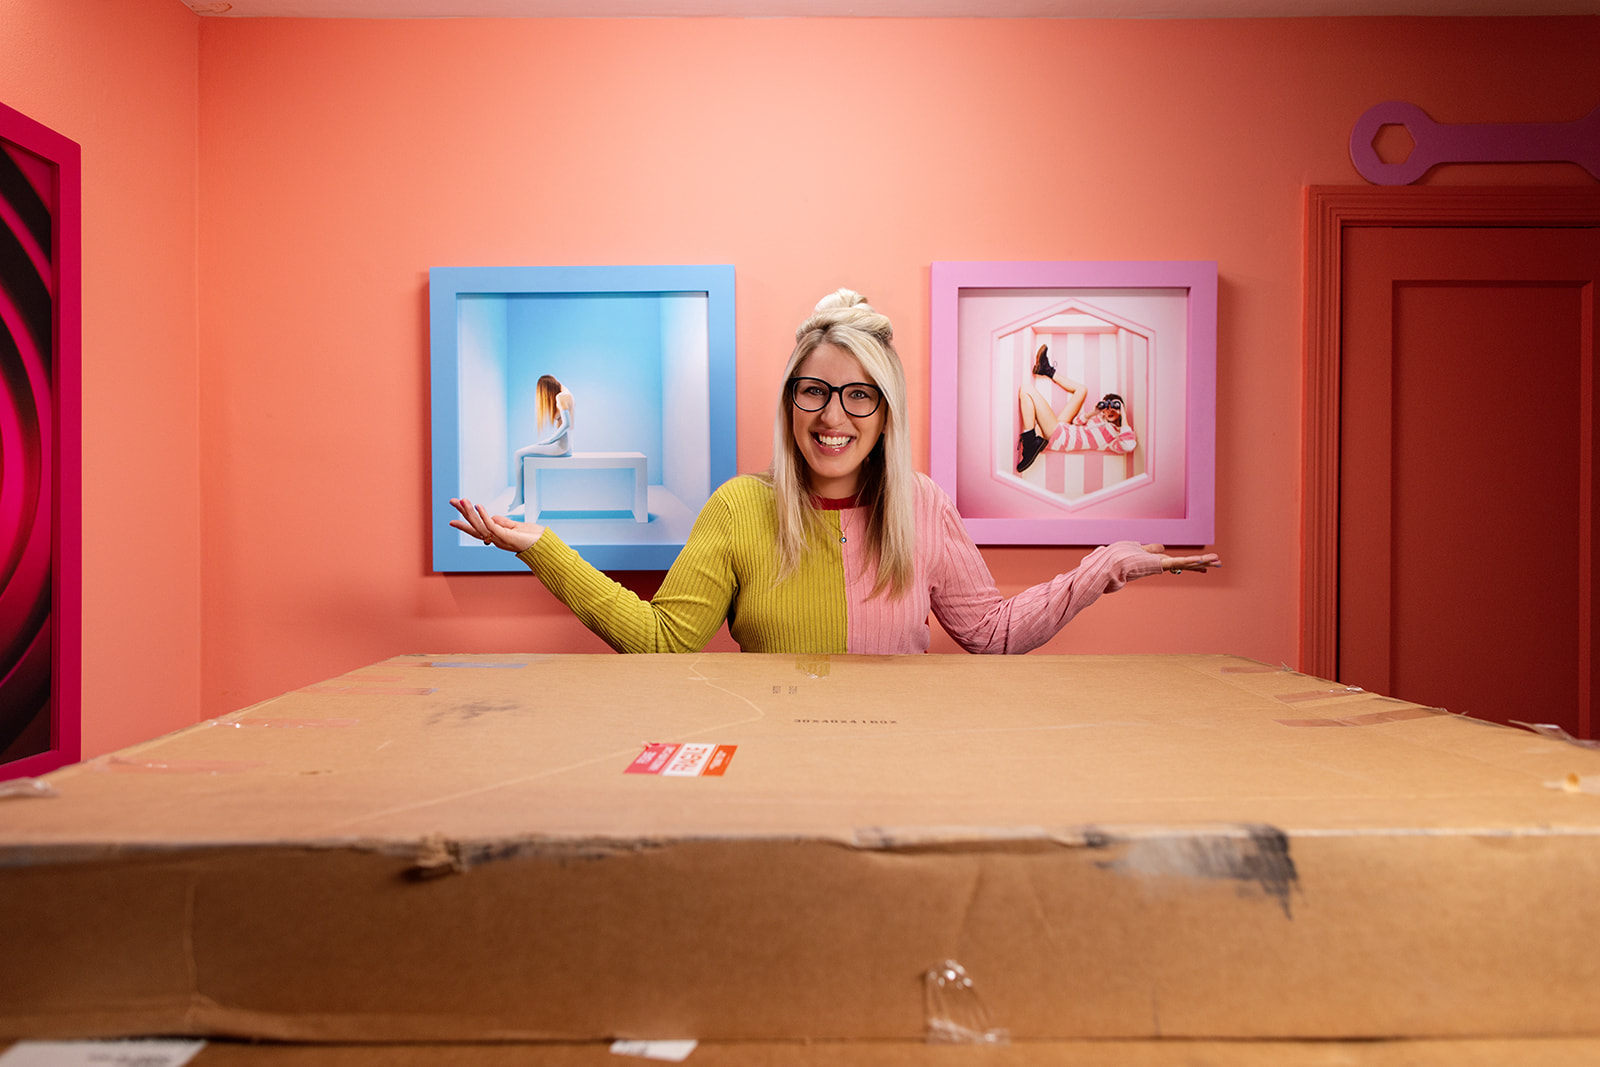
Why This Shoot Meant So Much to Us
By the end, I was completely blown away by the images. They were trippy, surreal, and uncomfortable in exactly the way we hoped for.
This video doesn’t just show the final photos. It shows the full process. The uncertainty. The problem solving. The debates. The moments where we weren’t sure if it was going to work at all.
Those are my favorite parts.
If you’ve ever felt creatively stuck, or wondered what happens when you push past the safe version of an idea, I think you’ll really enjoy this one. Check out the full video.