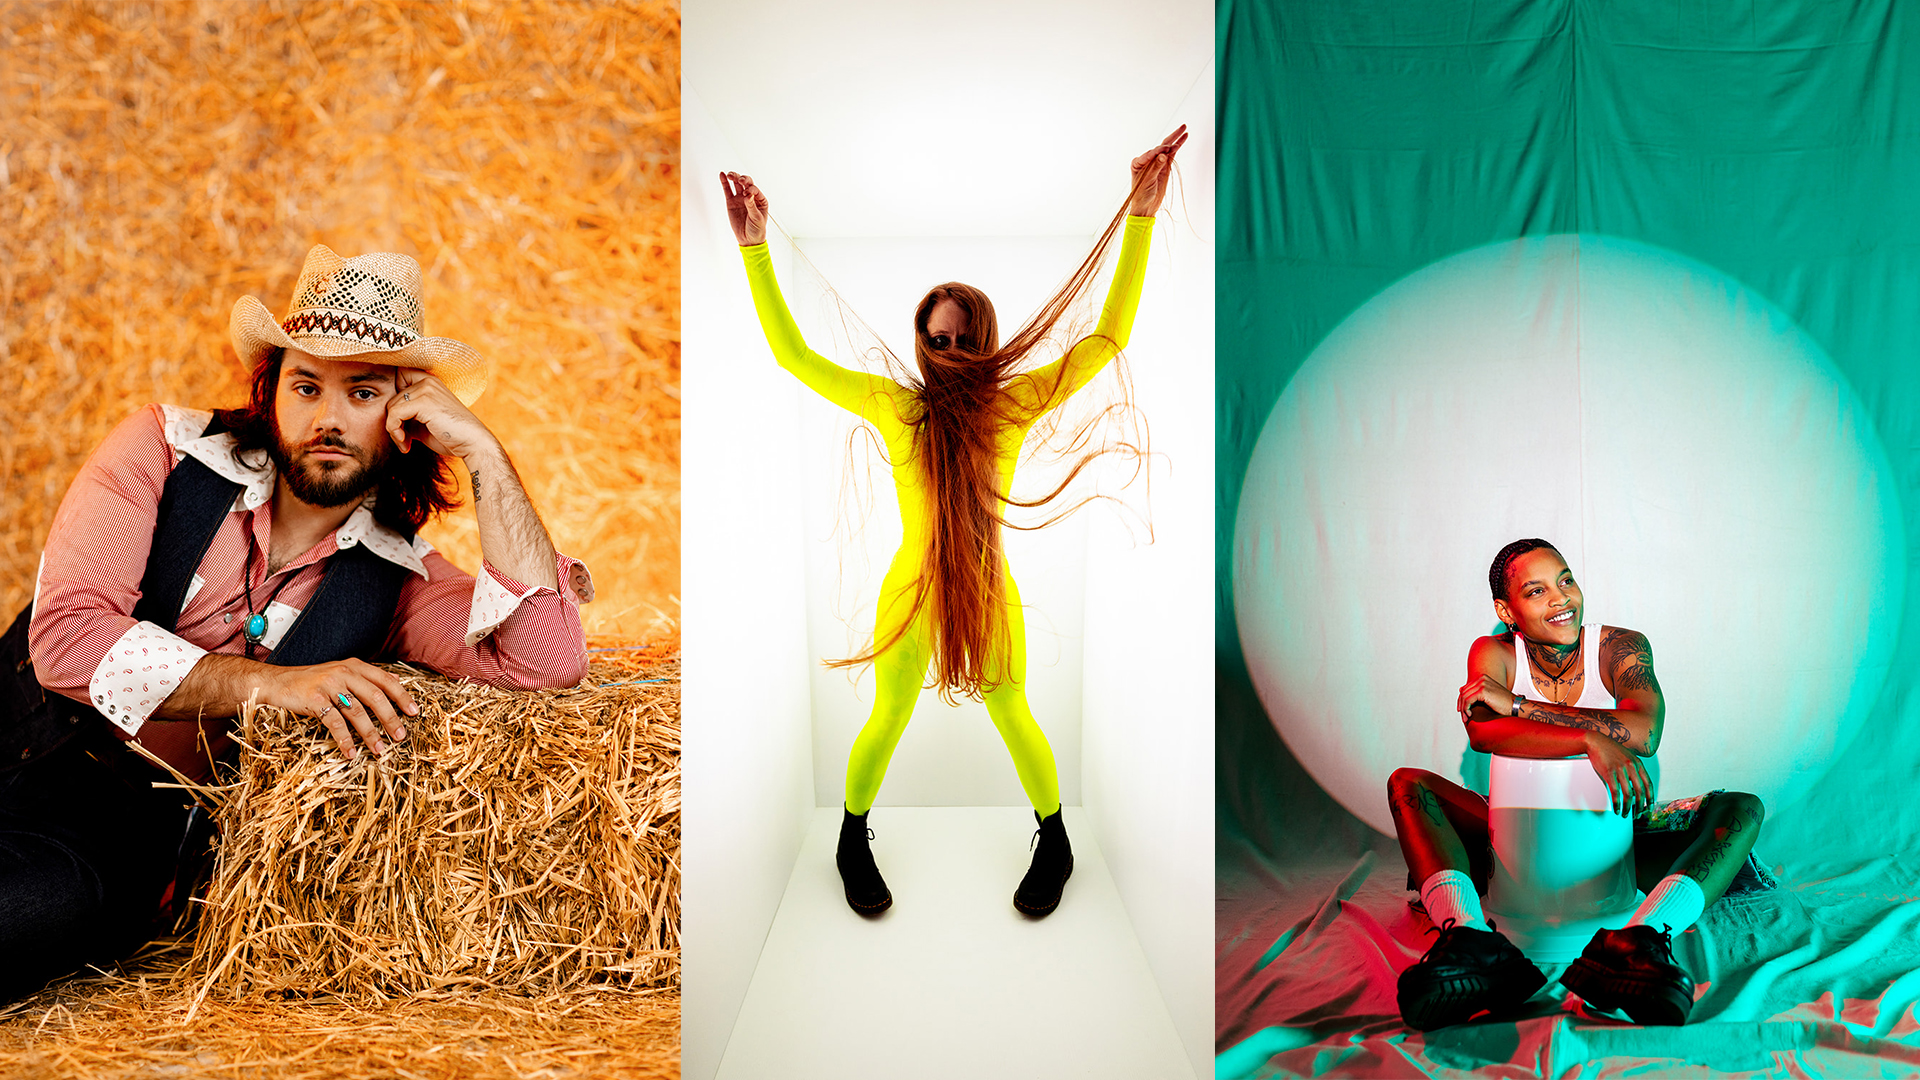

Lighting is the easiest way to instantly change the mood of a shoot. In this post, I’ll walk you through three different creative lighting setups we used on the same set with the same model and show how dramatically the look changes each time.
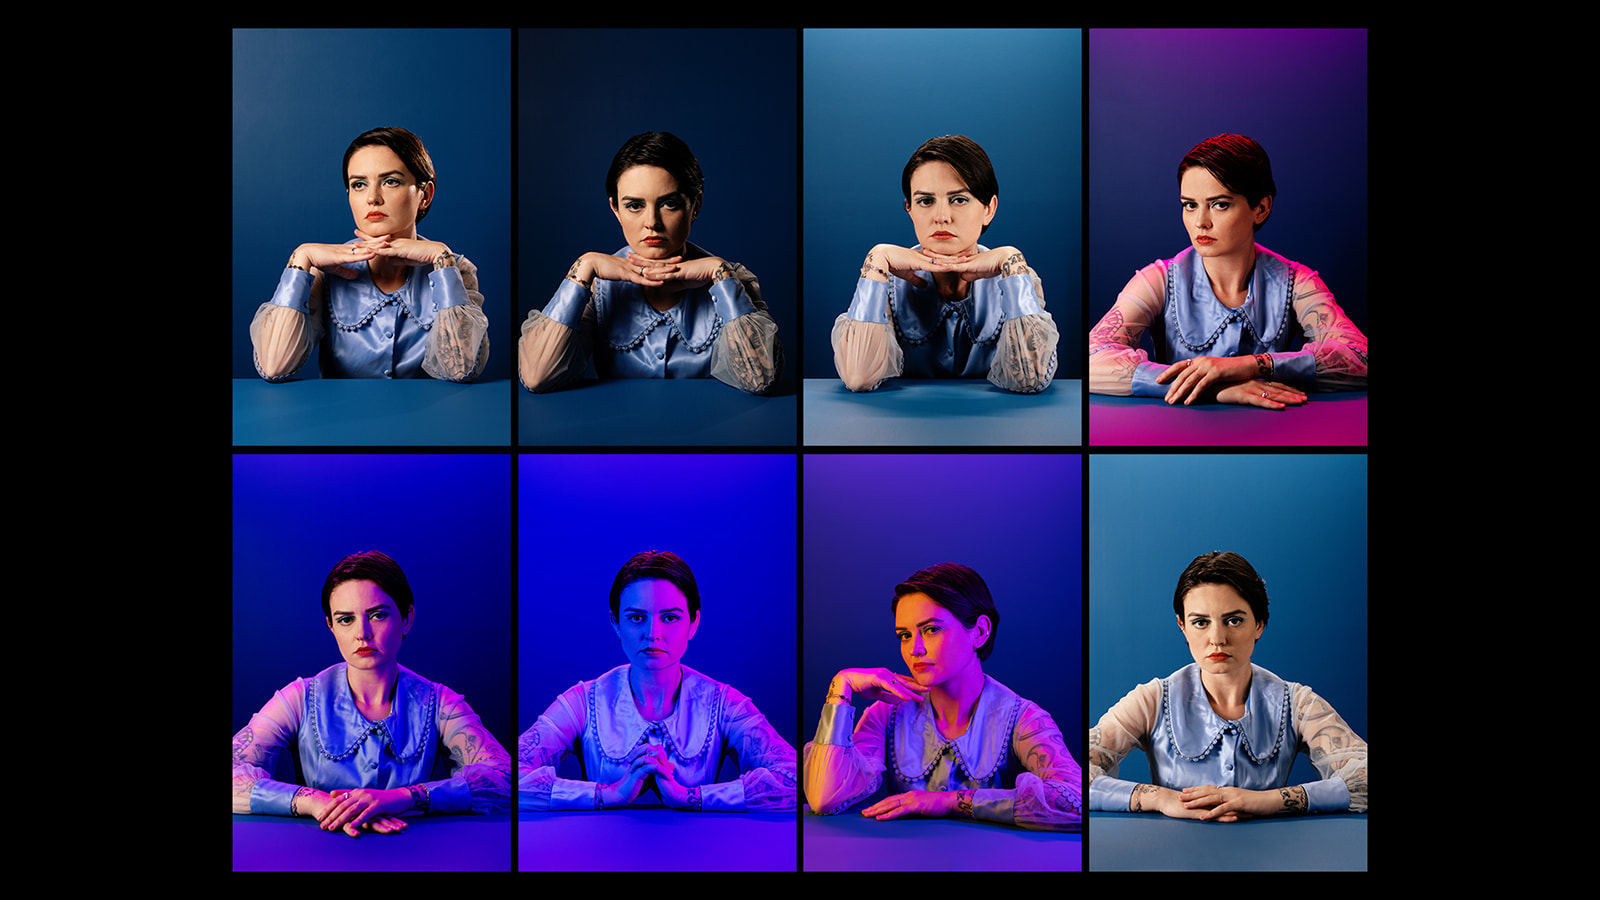
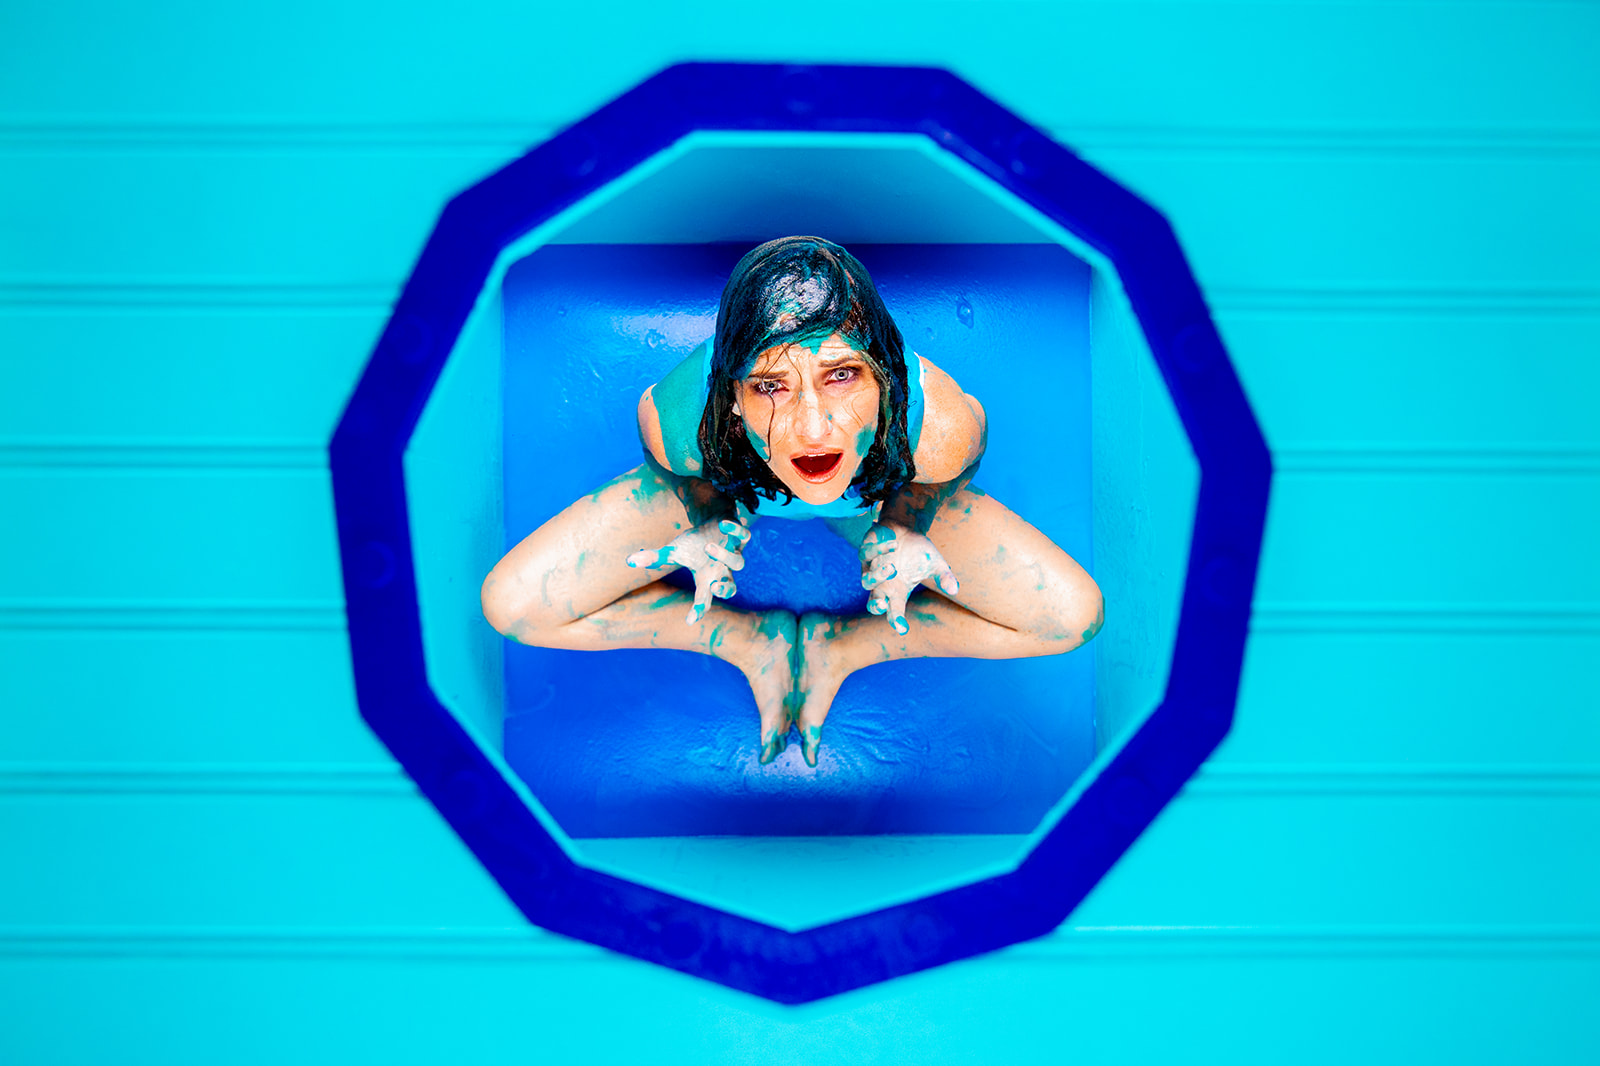
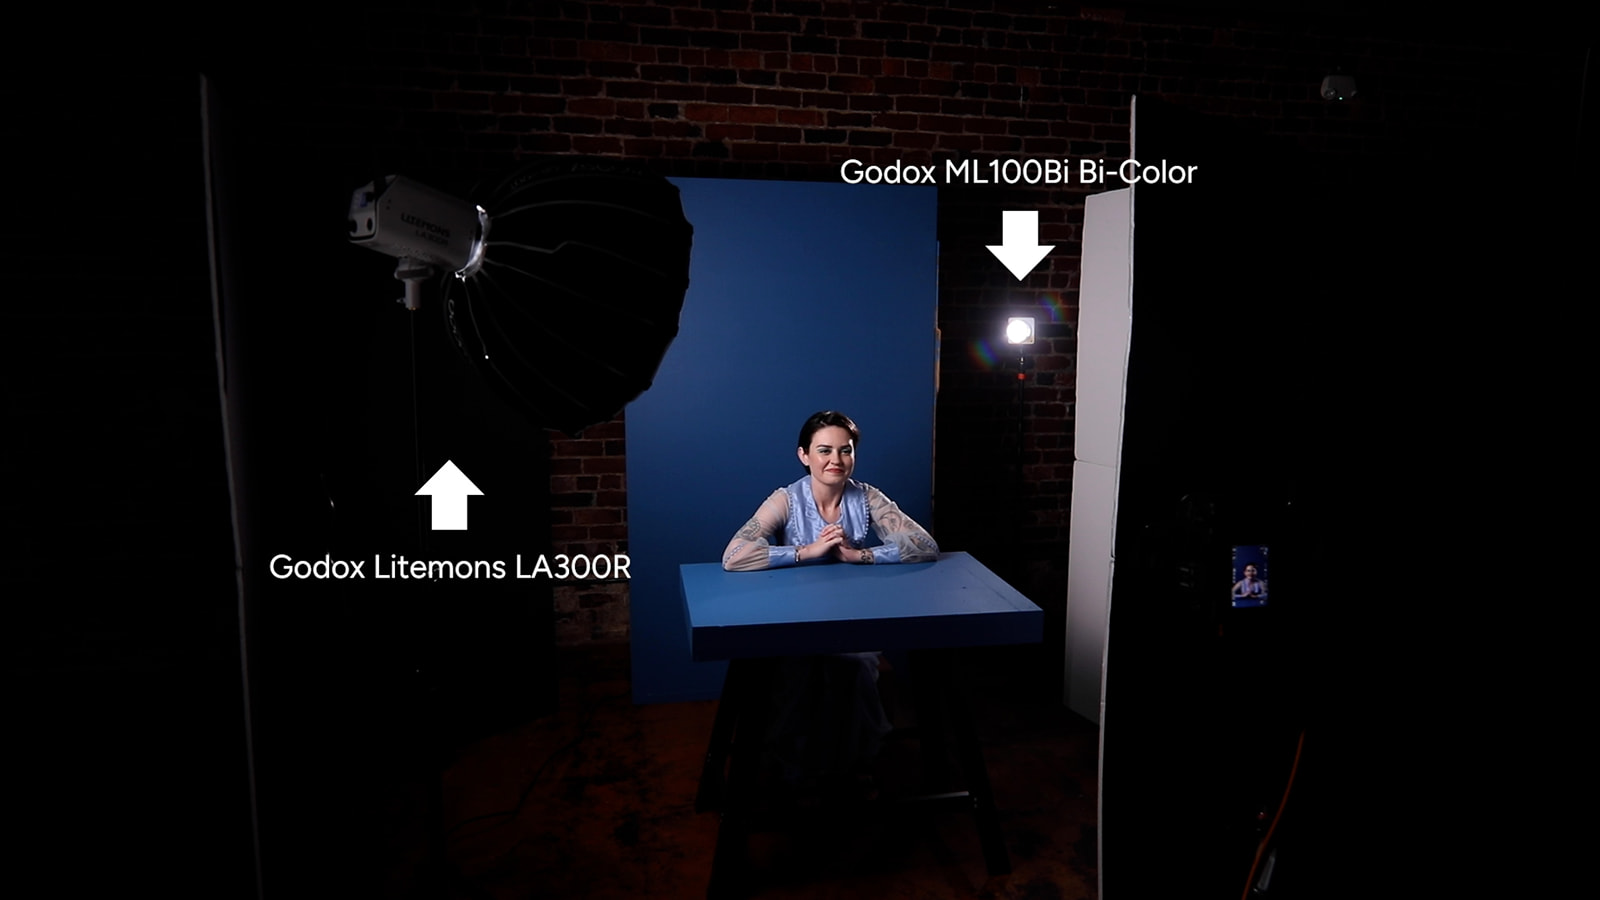
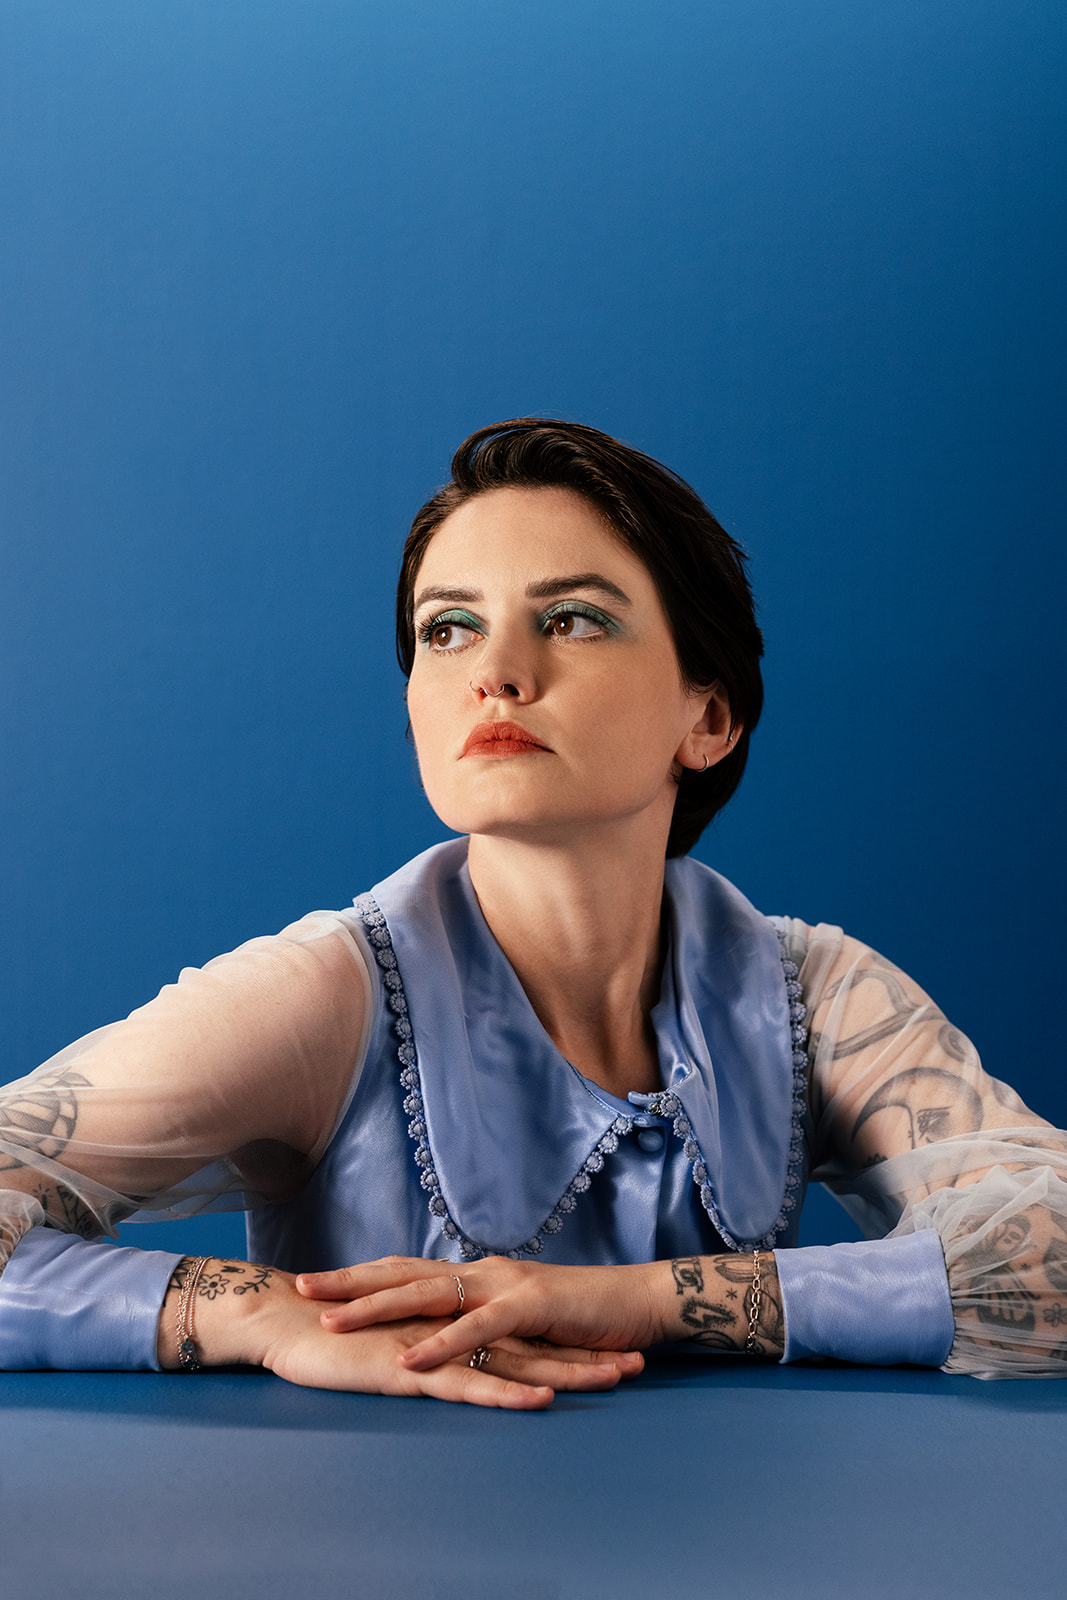
For this shoot we kept the set simple because we really wanted the lighting to be the star. We used a Hollywood flat and tabletop painted blue to match our model Rose’s dress. A minimal set was really key here that way the lighting could do all the heavy lifting.
Setup 1: Clean & High-Key
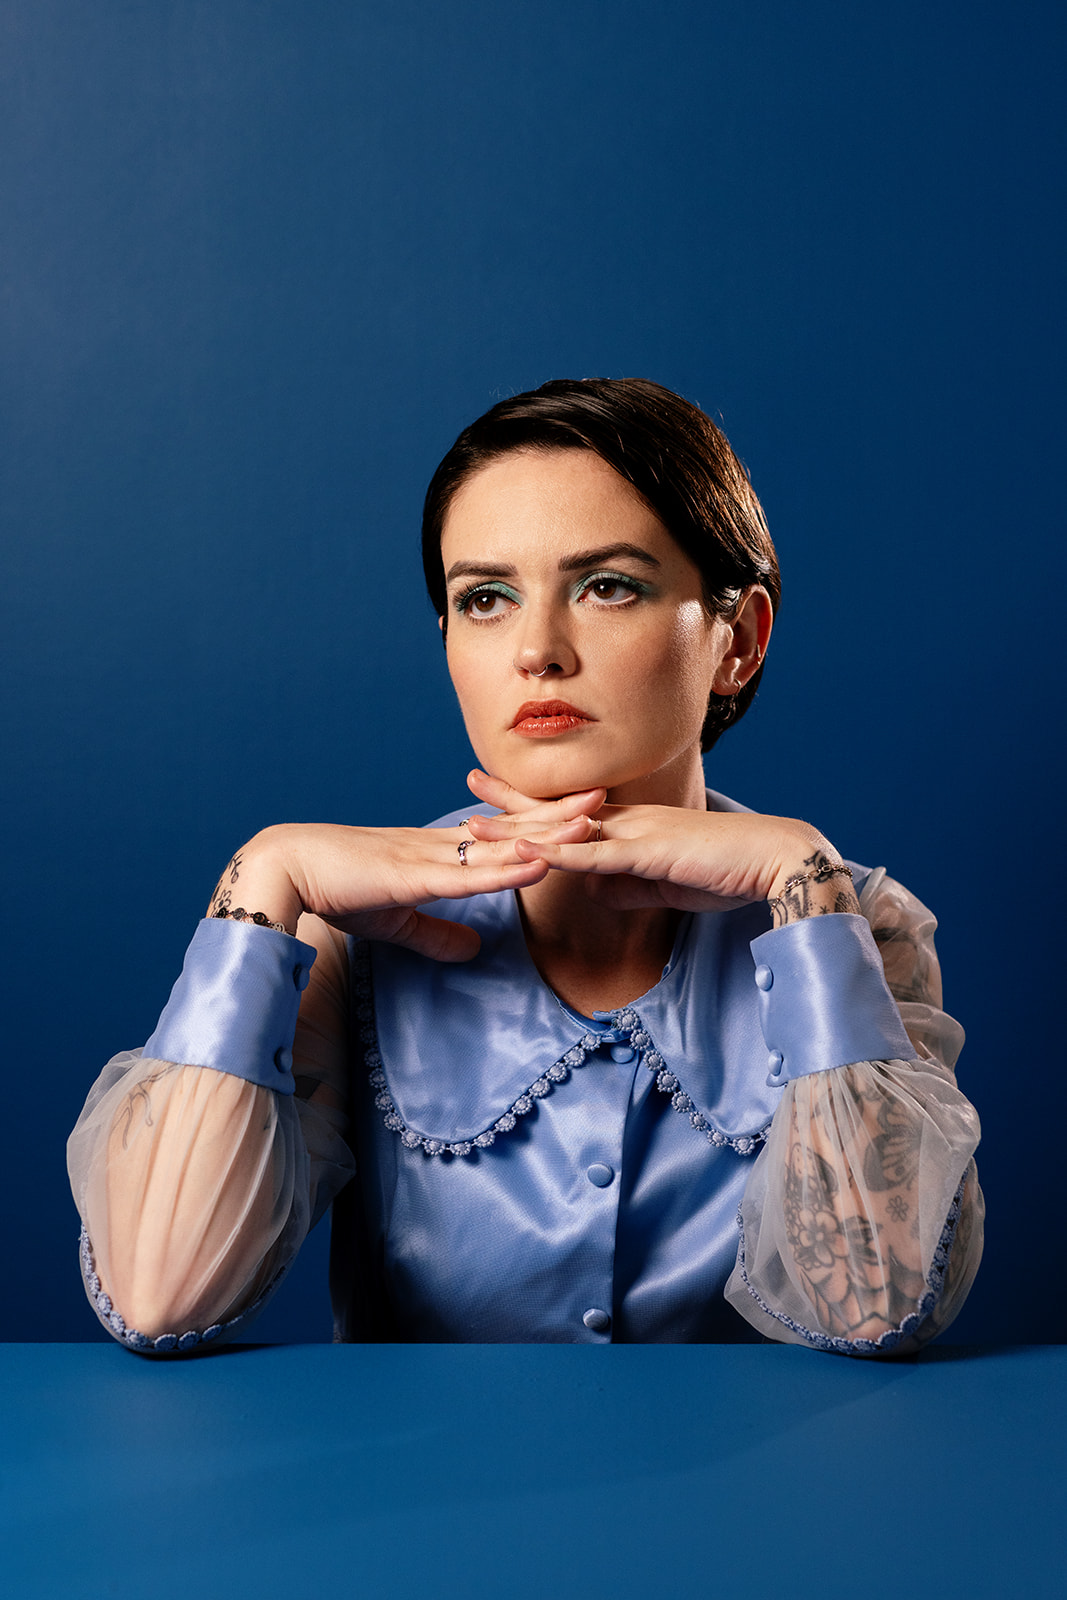
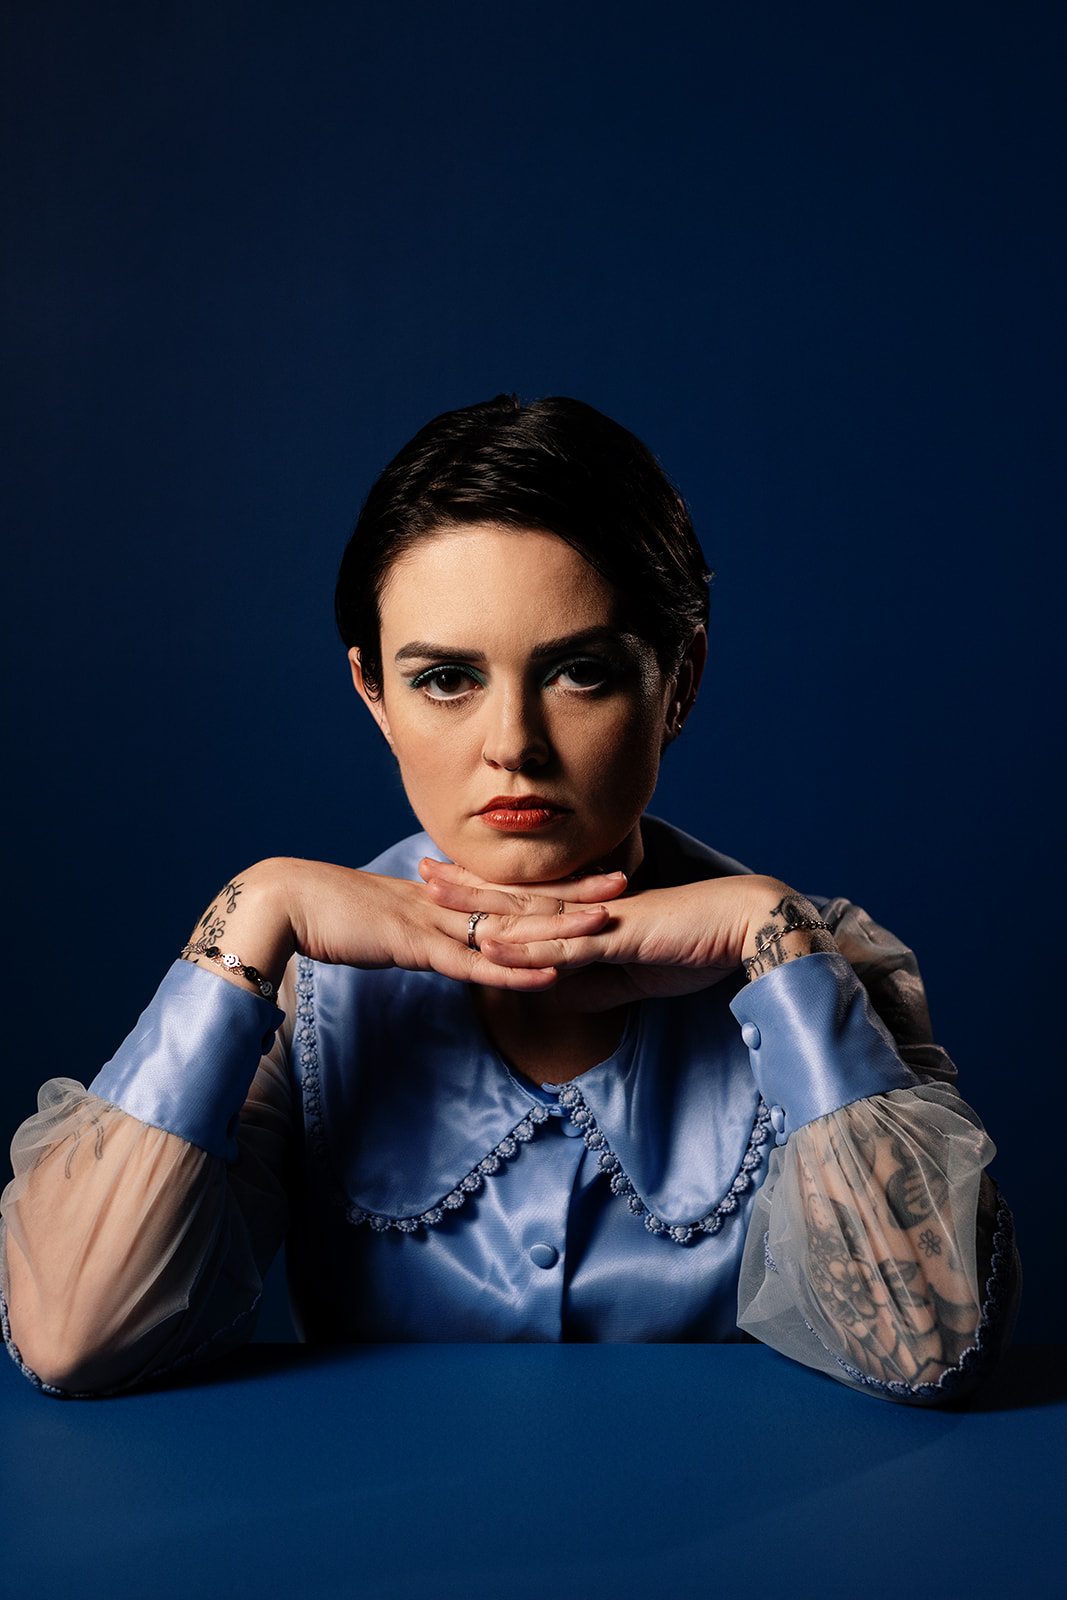
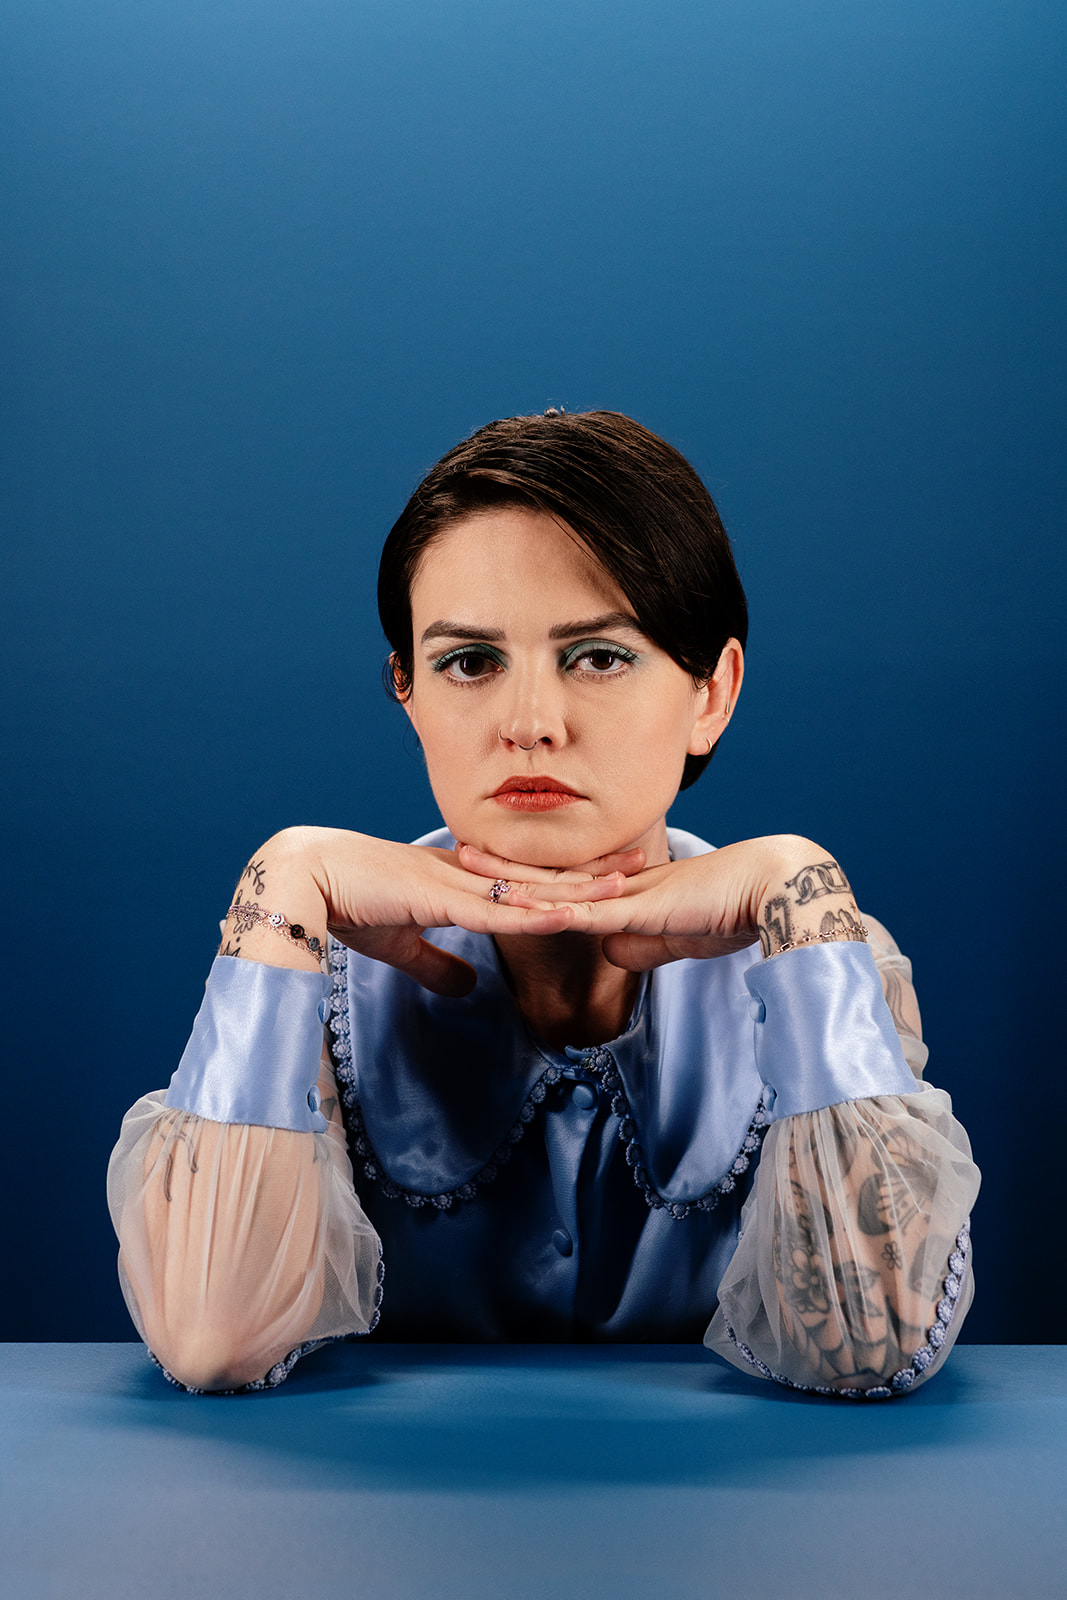
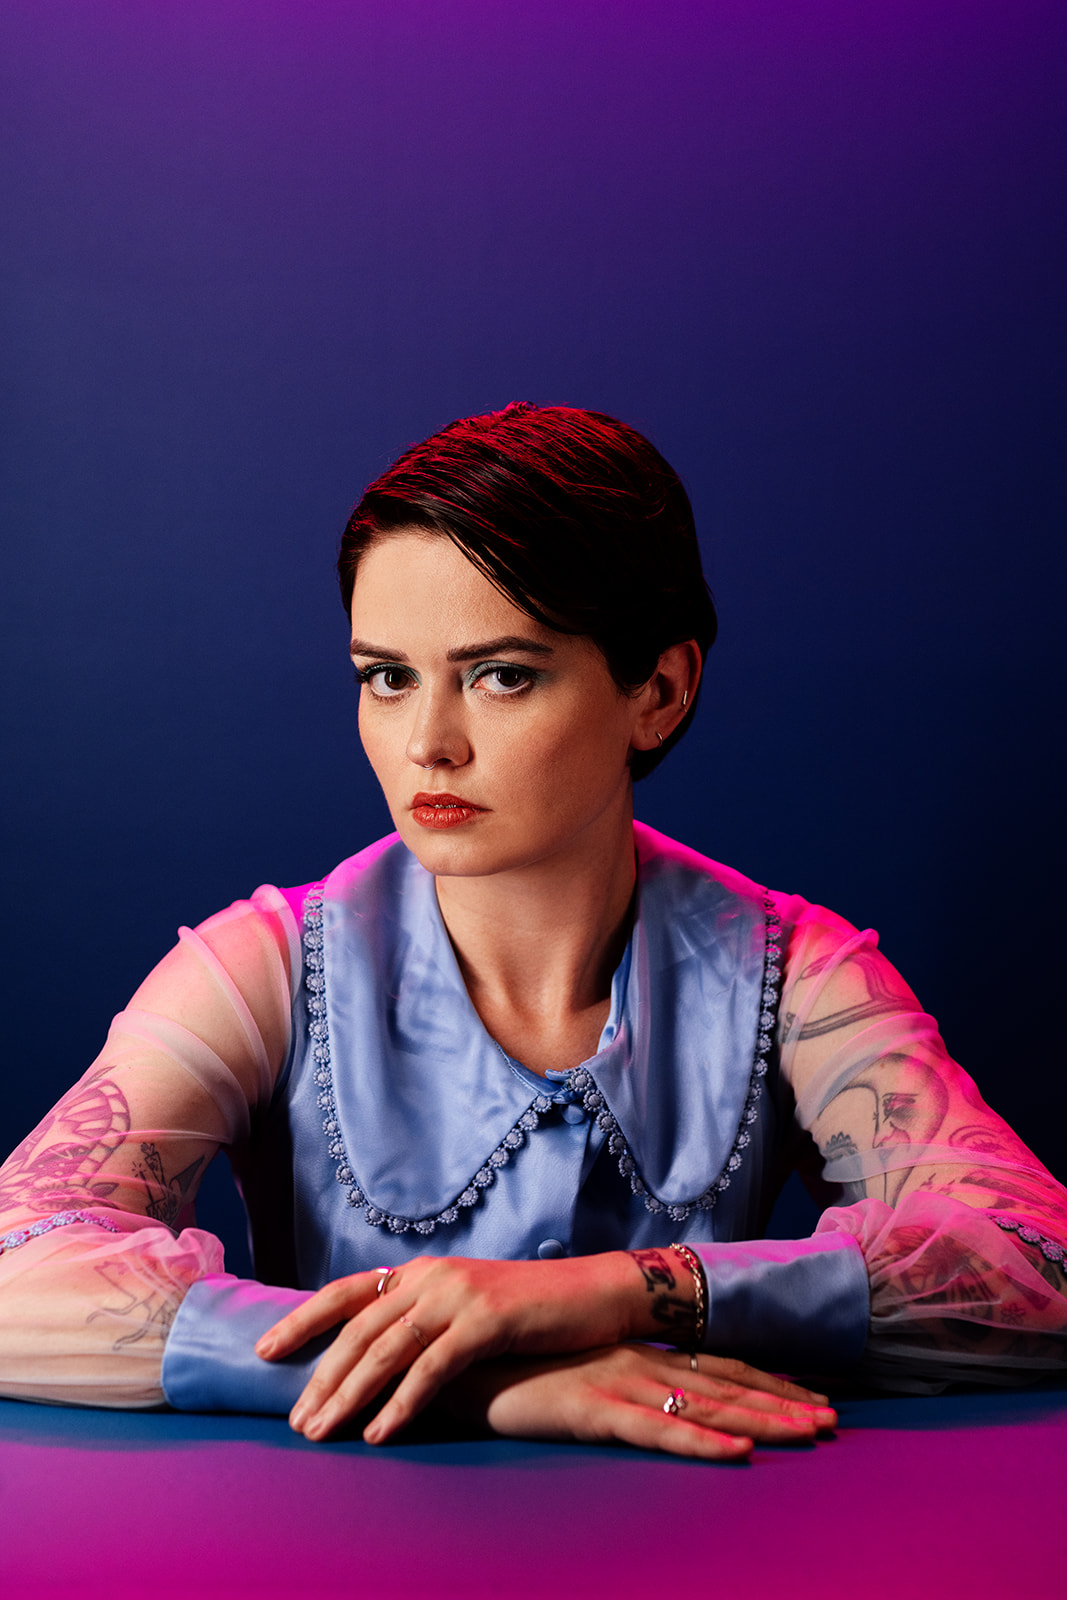
David and I love a high-key setup. It’s bright, polished, and commercial-friendly, and we reach for it more than any other look. We spend a lot of time picking the exact color to paint a set, and I love when the outfit matches the backdrop like it does here. High-key lighting keeps everything even and lets those colors show up exactly how we imagined.
Gear & Placement:
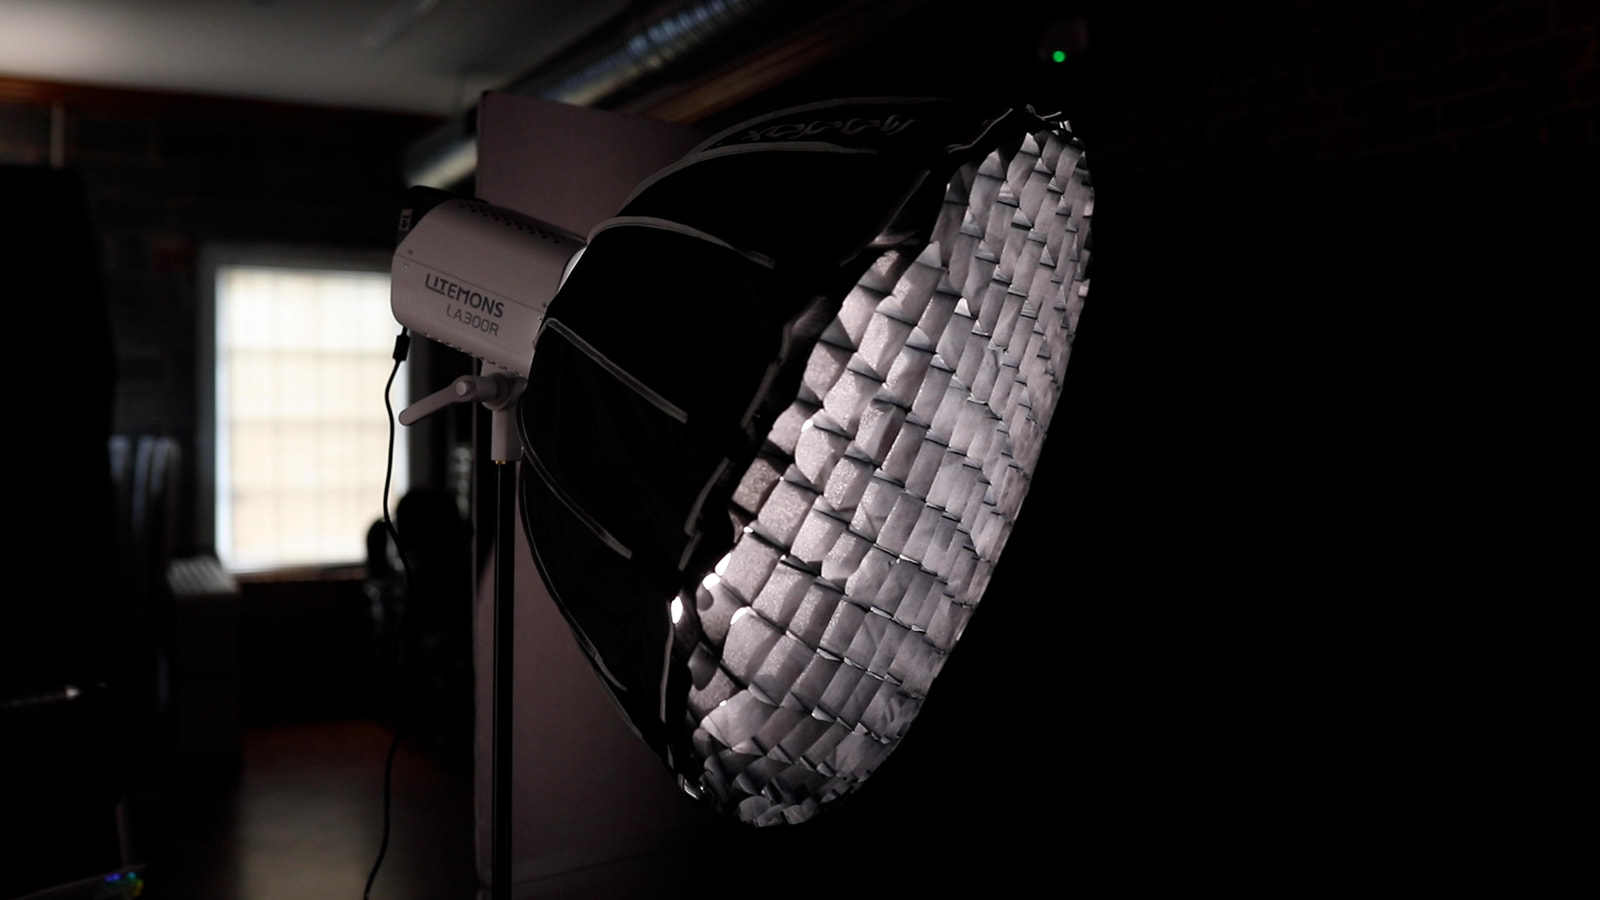
- Key: Godox LA300R with a QRP70T softbox, slightly above and to camera left
- Rim: Godox ML100 bi-color behind Rose, camera right
- White V-flat on camera right for positive fill
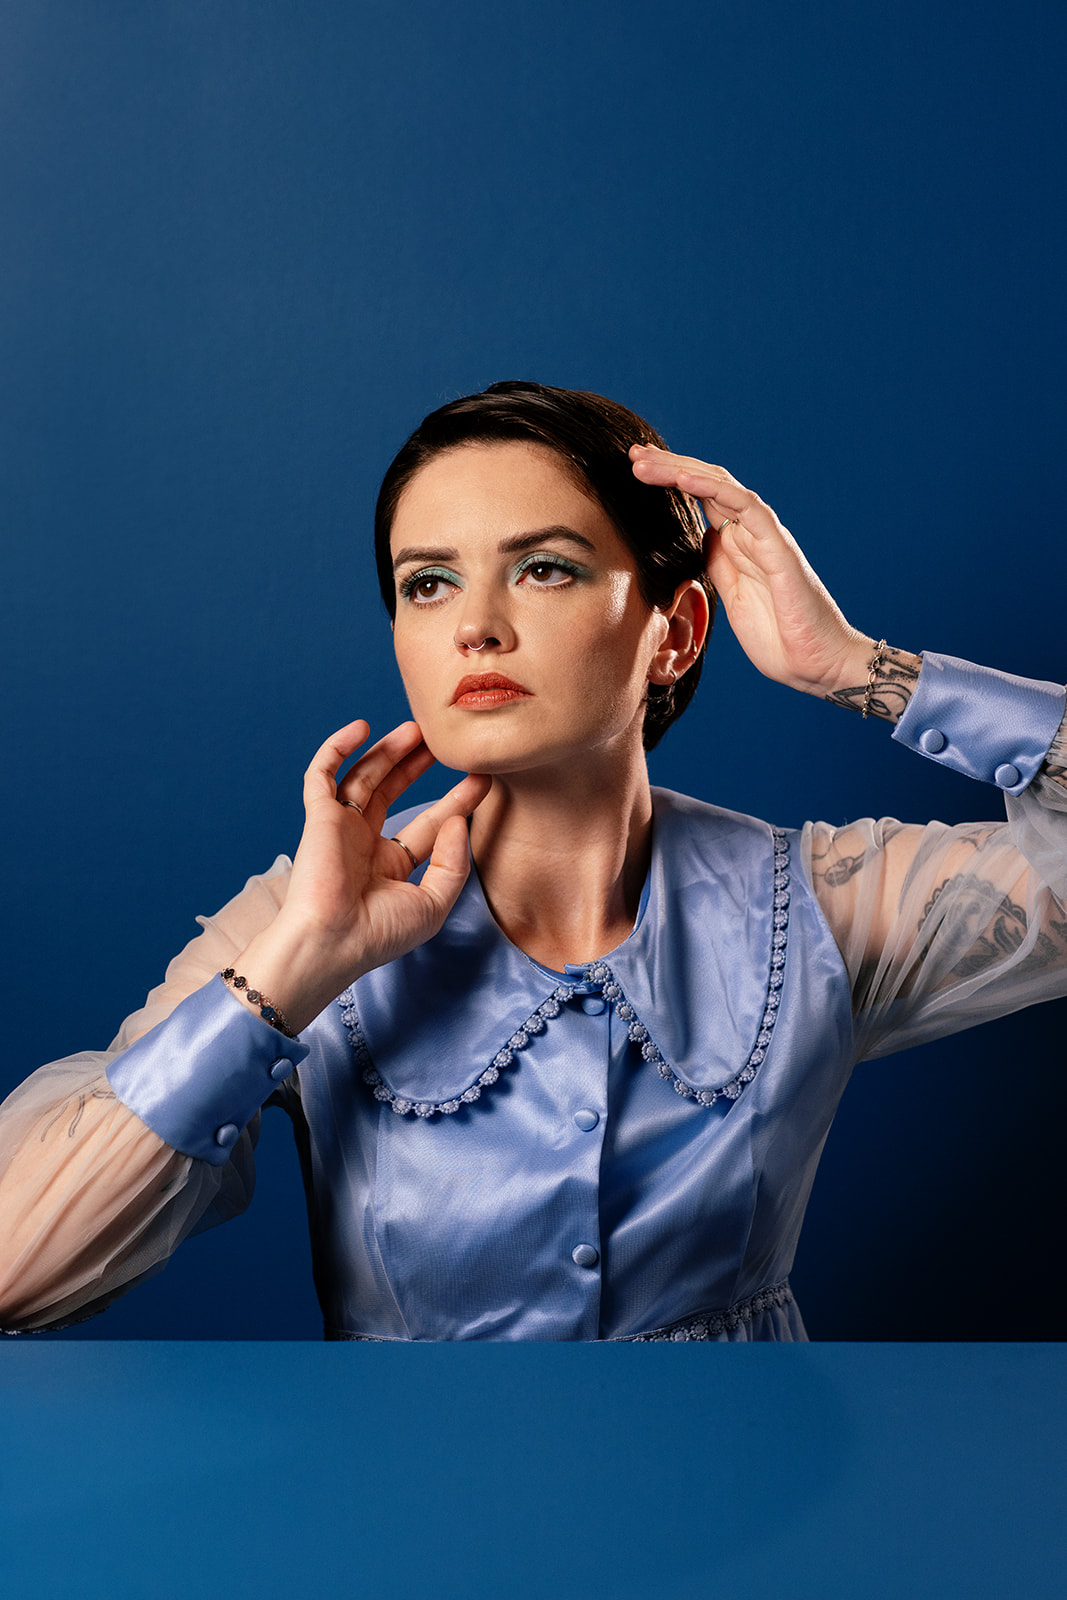
Because we were using a smaller modifier—about 27½ inches—and had the key light positioned to the left of the camera, we got a little shadow on the right side of Rose’s face. The V-flat gave us some positive fill and softened those shadows, keeping the high-key vibe without making the image feel completely flat. I loved how that subtle shadow added dimension and helped sculpt Rose’s face. We could have reduced it even more by moving the V-flat closer, but honestly, we liked it just as it was. Another cool thing is that the key light also spilled onto the backdrop, giving us some extra light on the set.
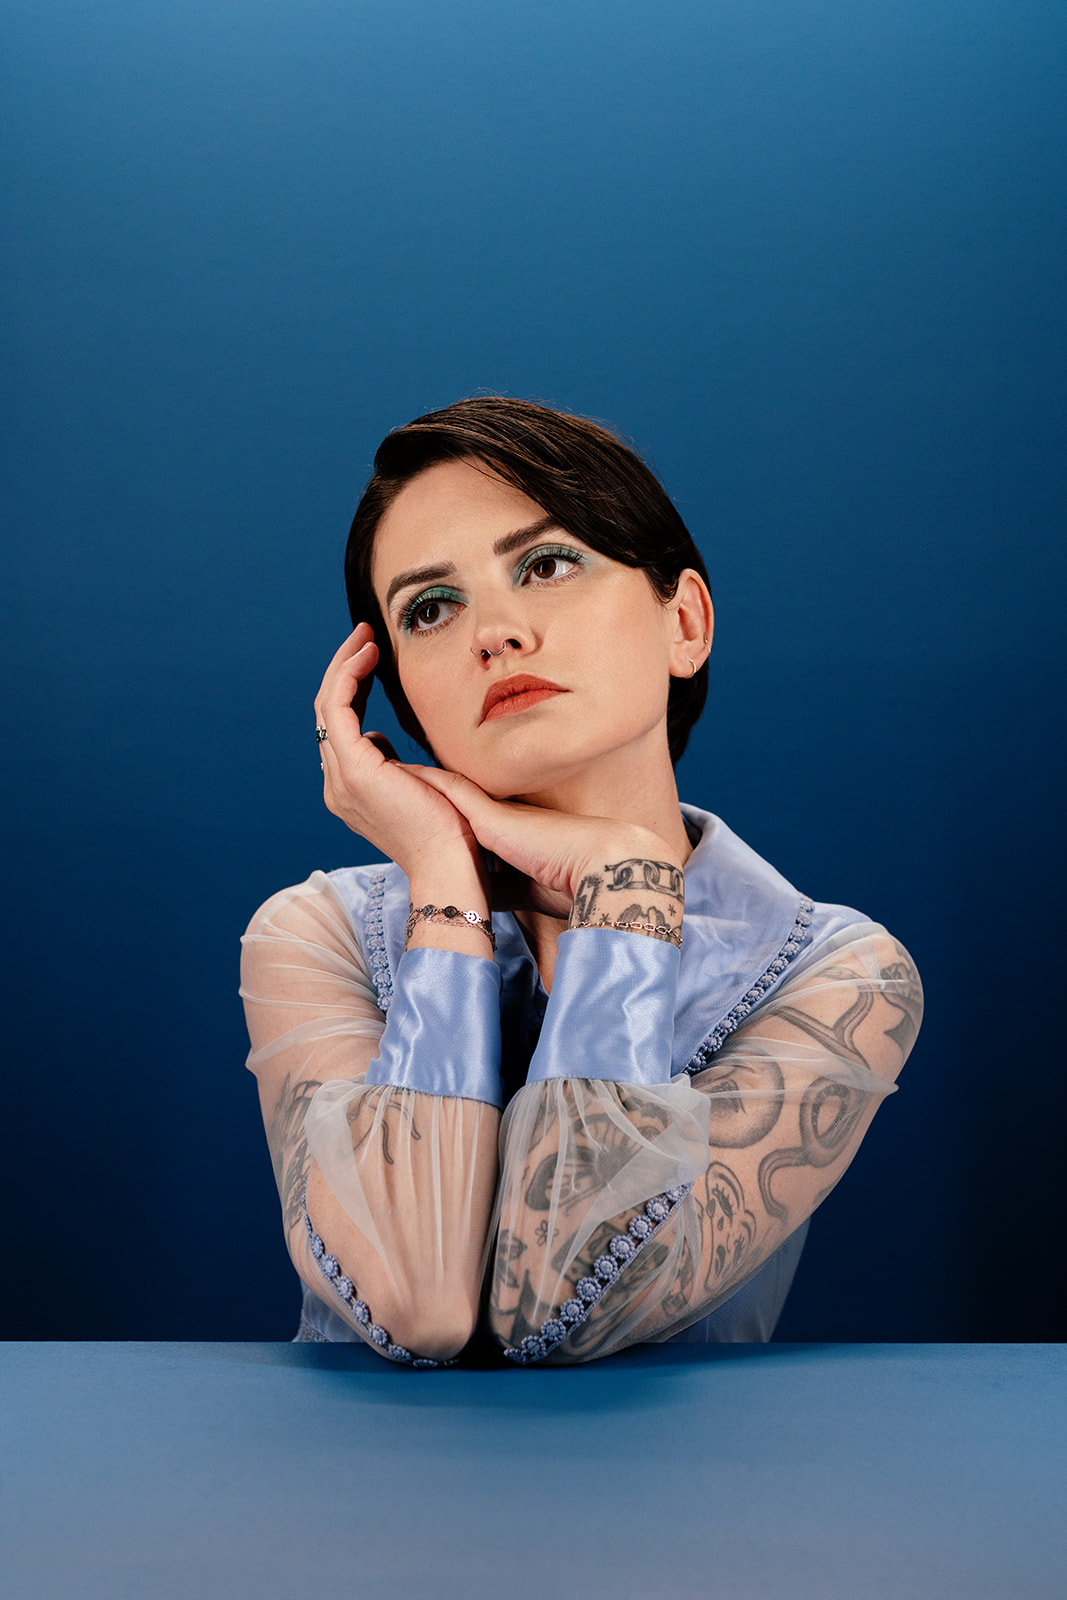
Adding in a grid
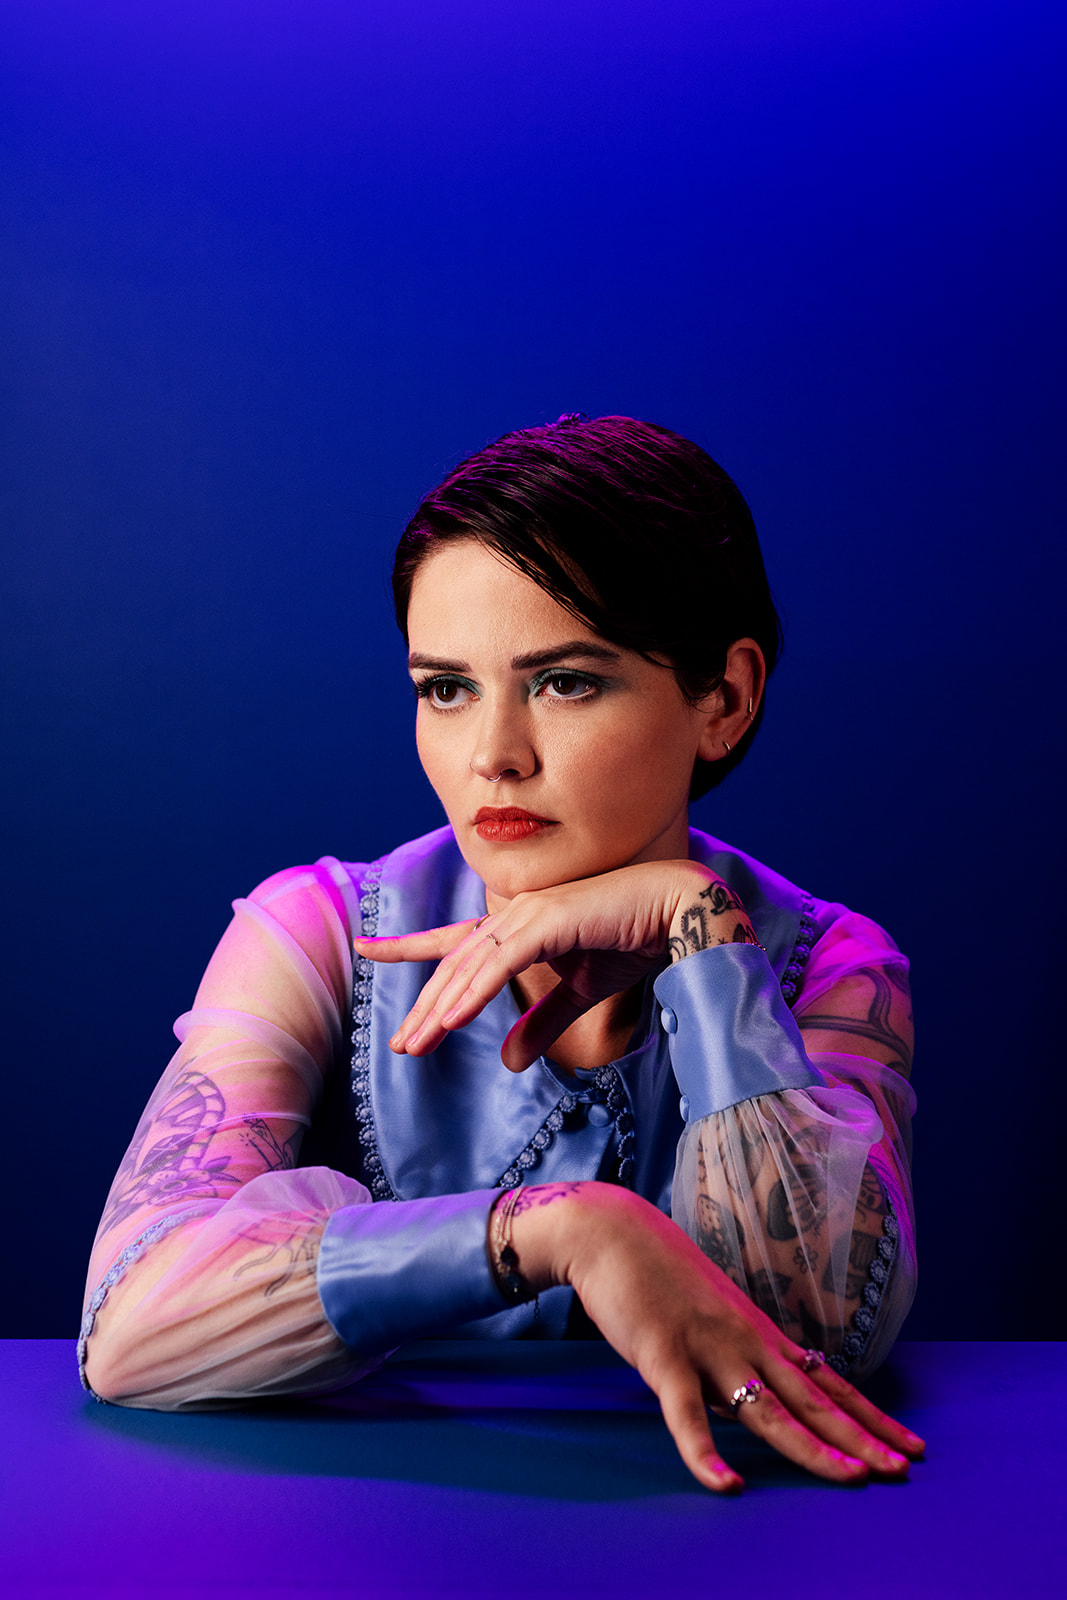
We wanted to make things a little moodier by adding more shadow. We didn’t move the lights at all so this is technically still the same light setup, we just tweaked a few things to pull in more drama.
So here's what we changed:
- We added a grid to the key light to narrow and focus the key light.
- Then we flipped the V-flat to the black side to create negative fill on the right.
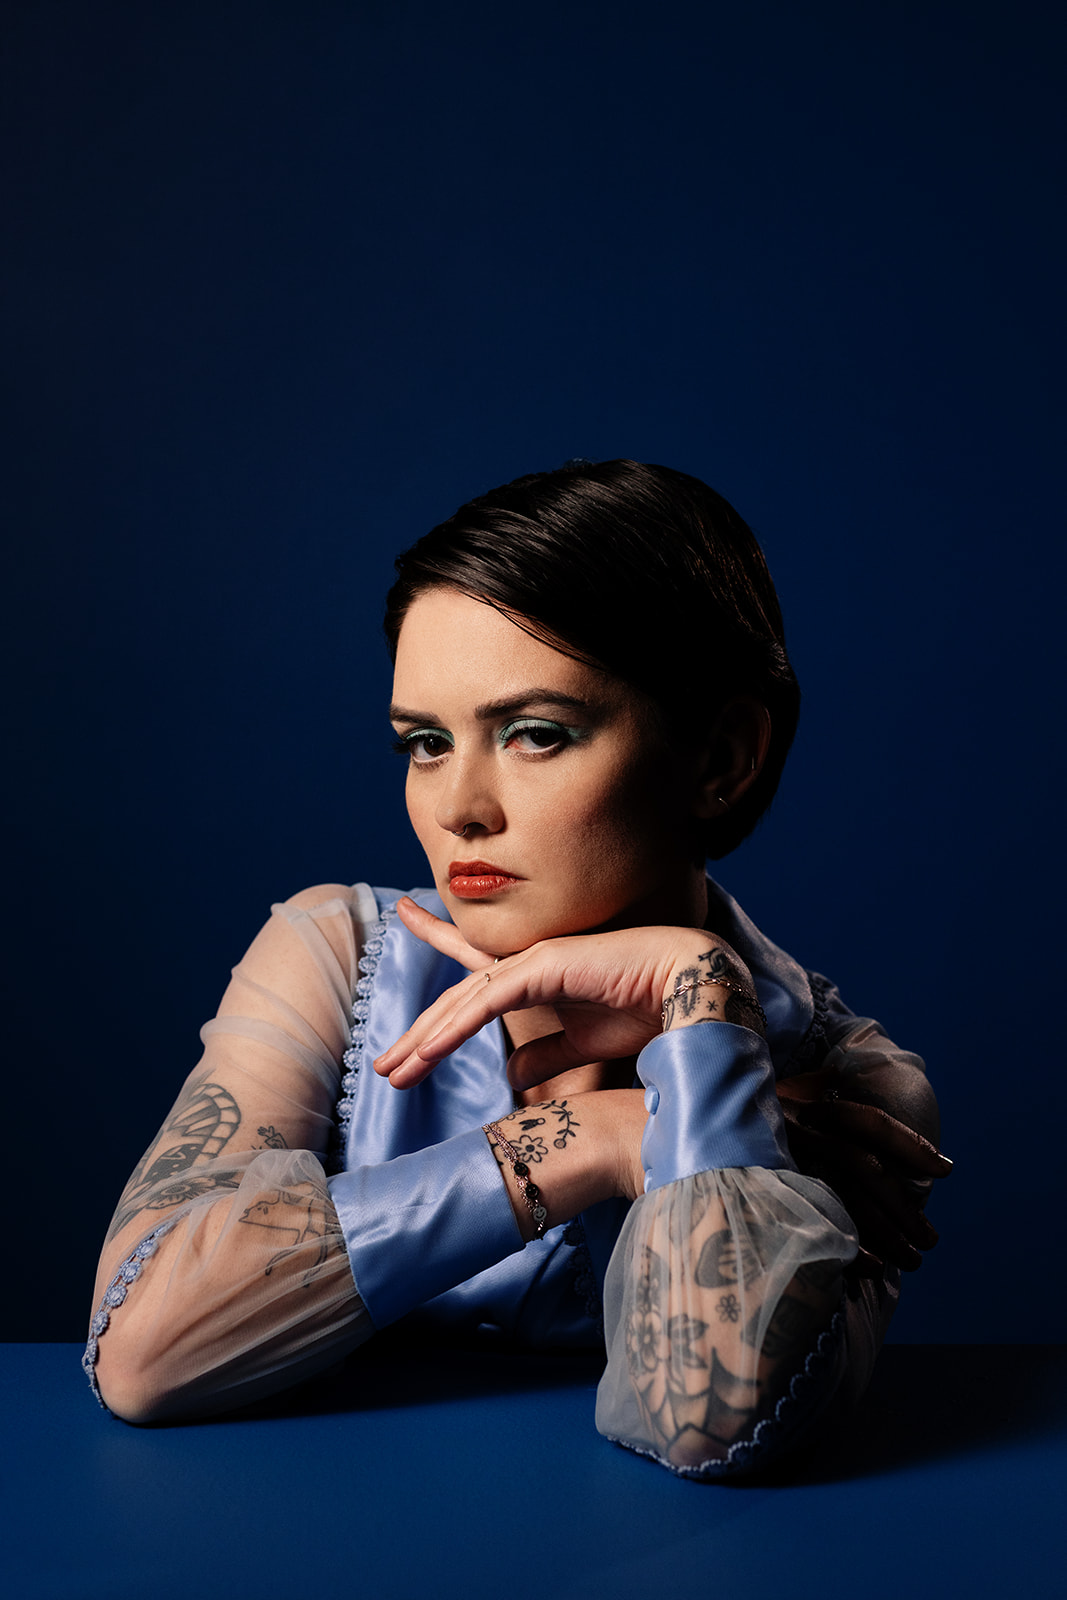
Those two tweaks deepened the shadows across Rose’s face and intensified the contrast. The light still comes from the same place, but now it’s focused and dramatic. The shadows across Rose’s face feel more sculpted, and the image has way more dimension.
Even the set colors shifted, proving how much light quality affects the entire image.
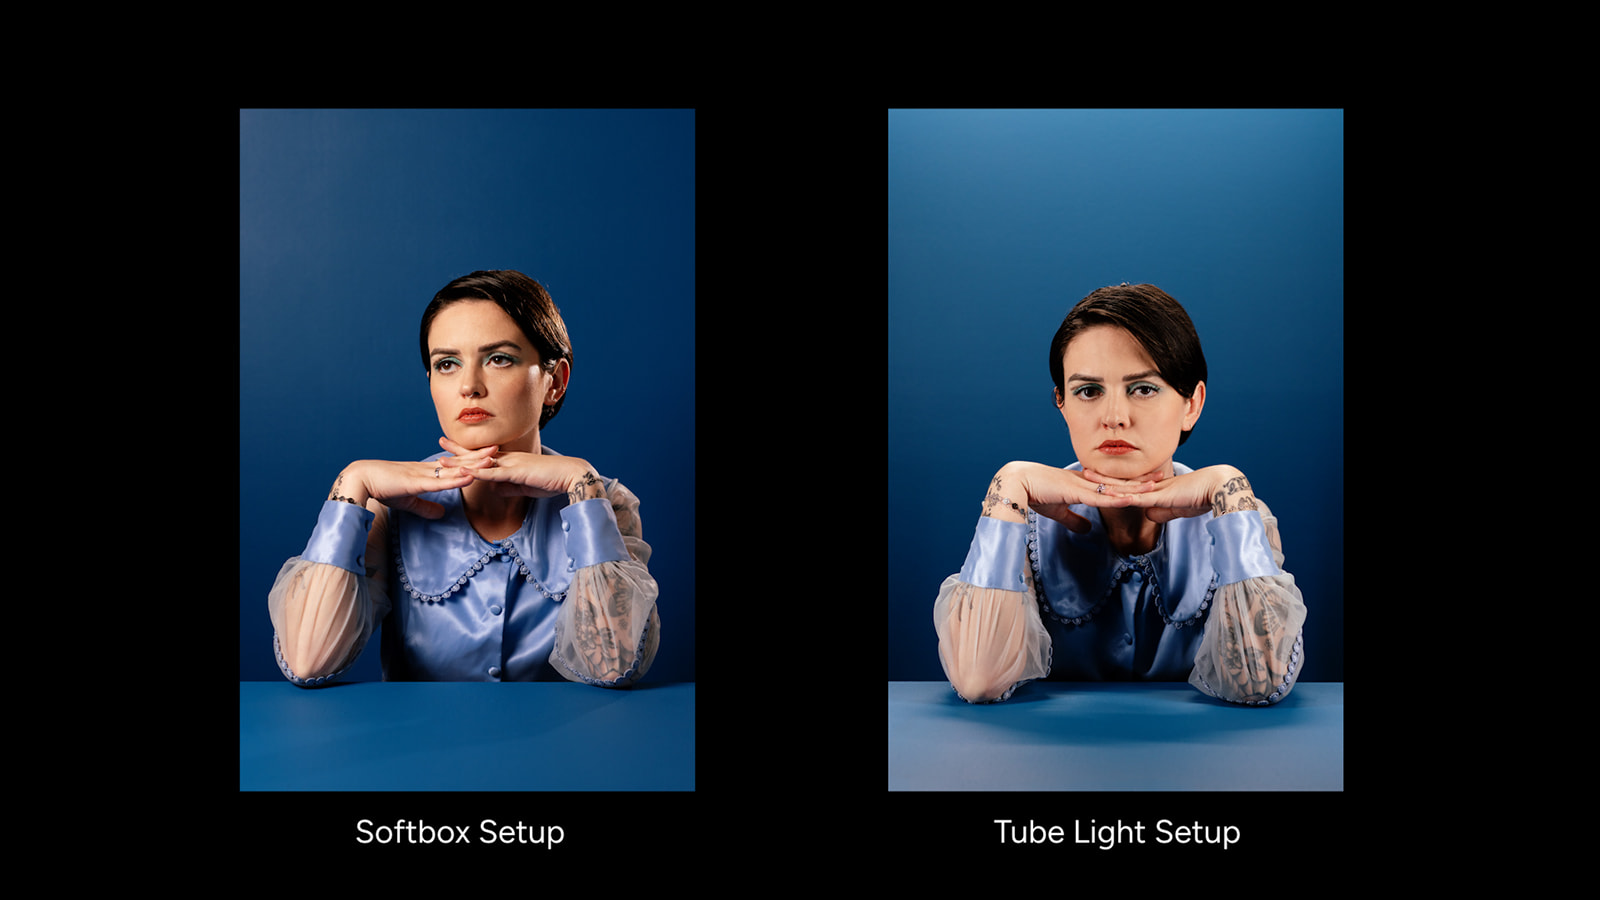
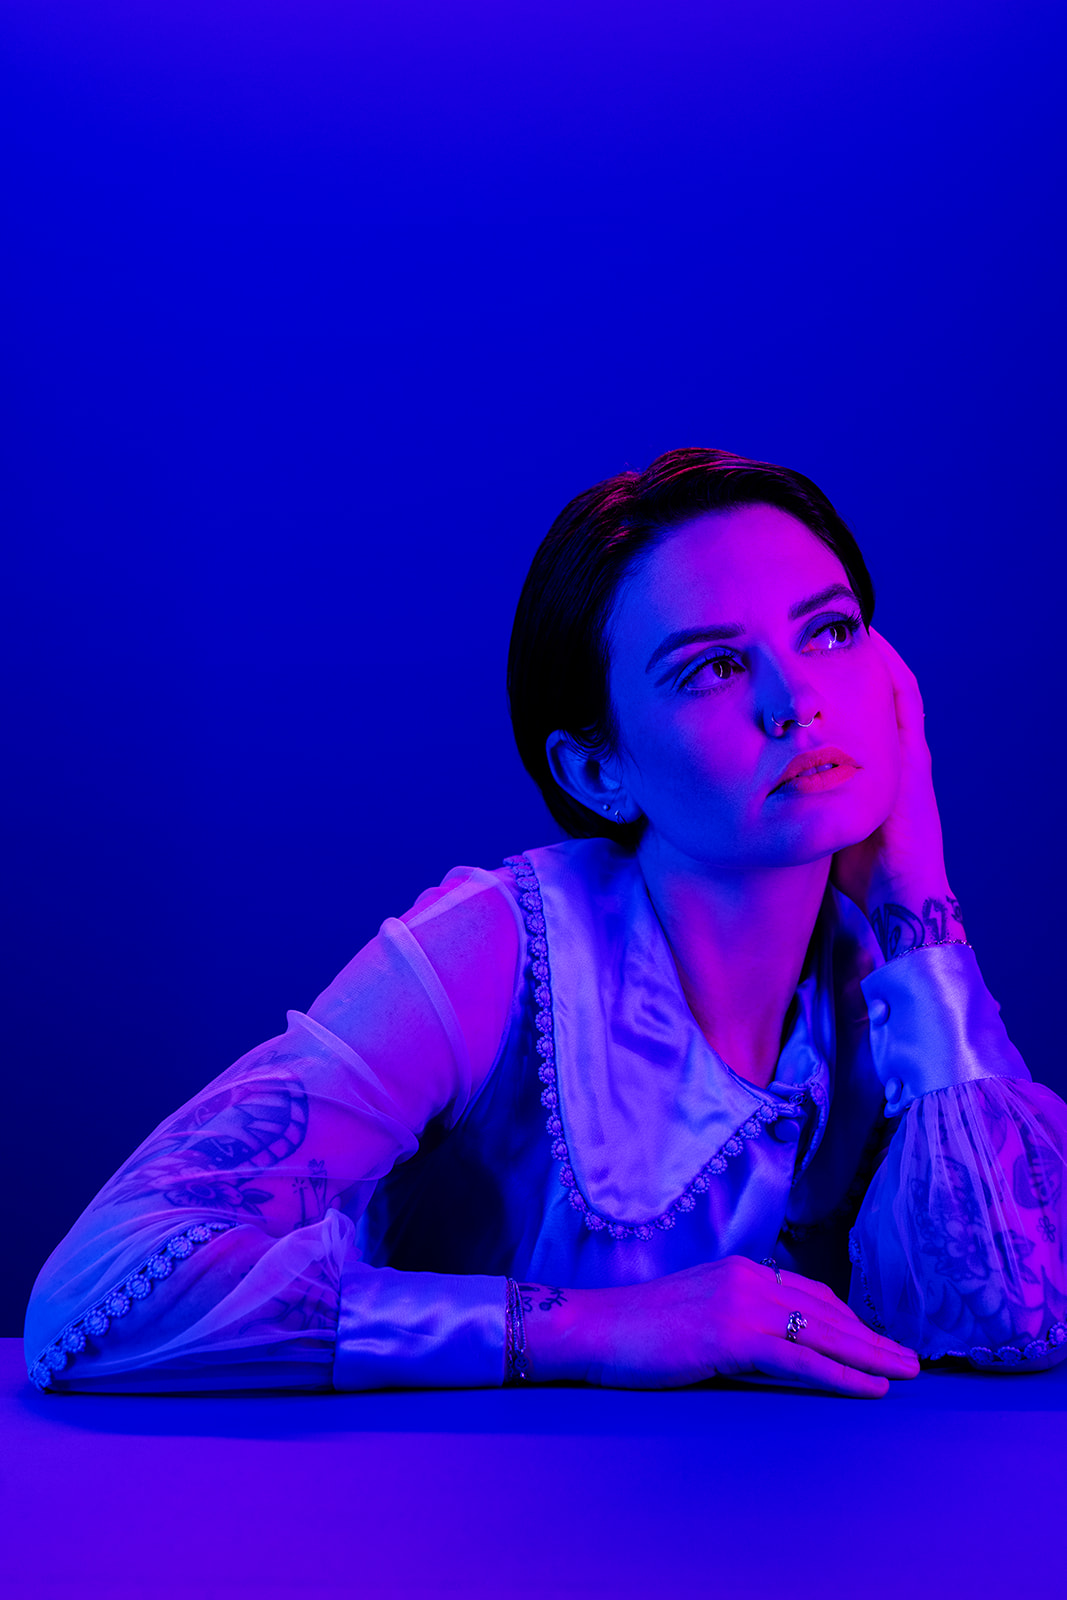
Comparing side by side
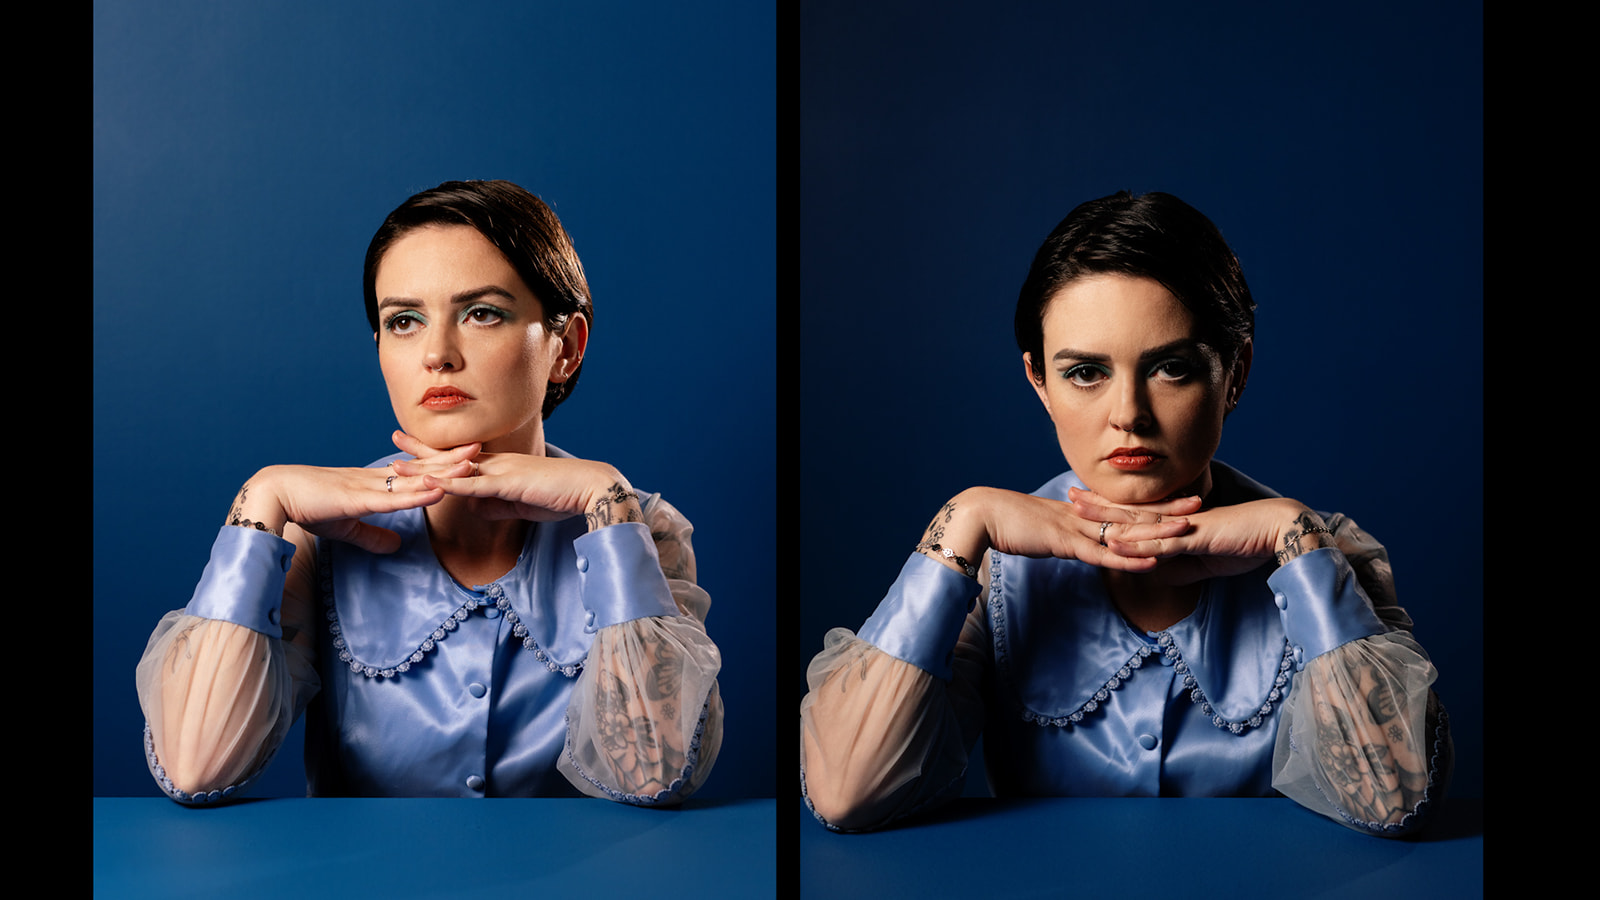
Adding the grid and flipping the V-flat for some negative fill gave us a totally different vibe. It created images that feel more fashion-forward and editorial, and less commercial.
Since David and I are so color-focused, it’s also worth noticing how much the set’s color shifted just by changing the lighting. It now has a deeper, more navy-blue tone compared to the first setup.
Setup 2: High-Key with LED Tube Lights
Could we recreate that airy high-key look using only LED tube lights? Yes—and then some.
We use tube lights a lot in our sets because they’re small, flexible, and super easy to position. They’re incredibly versatile. You can use them to light a backdrop, highlight legs, or just fill in wherever you need.
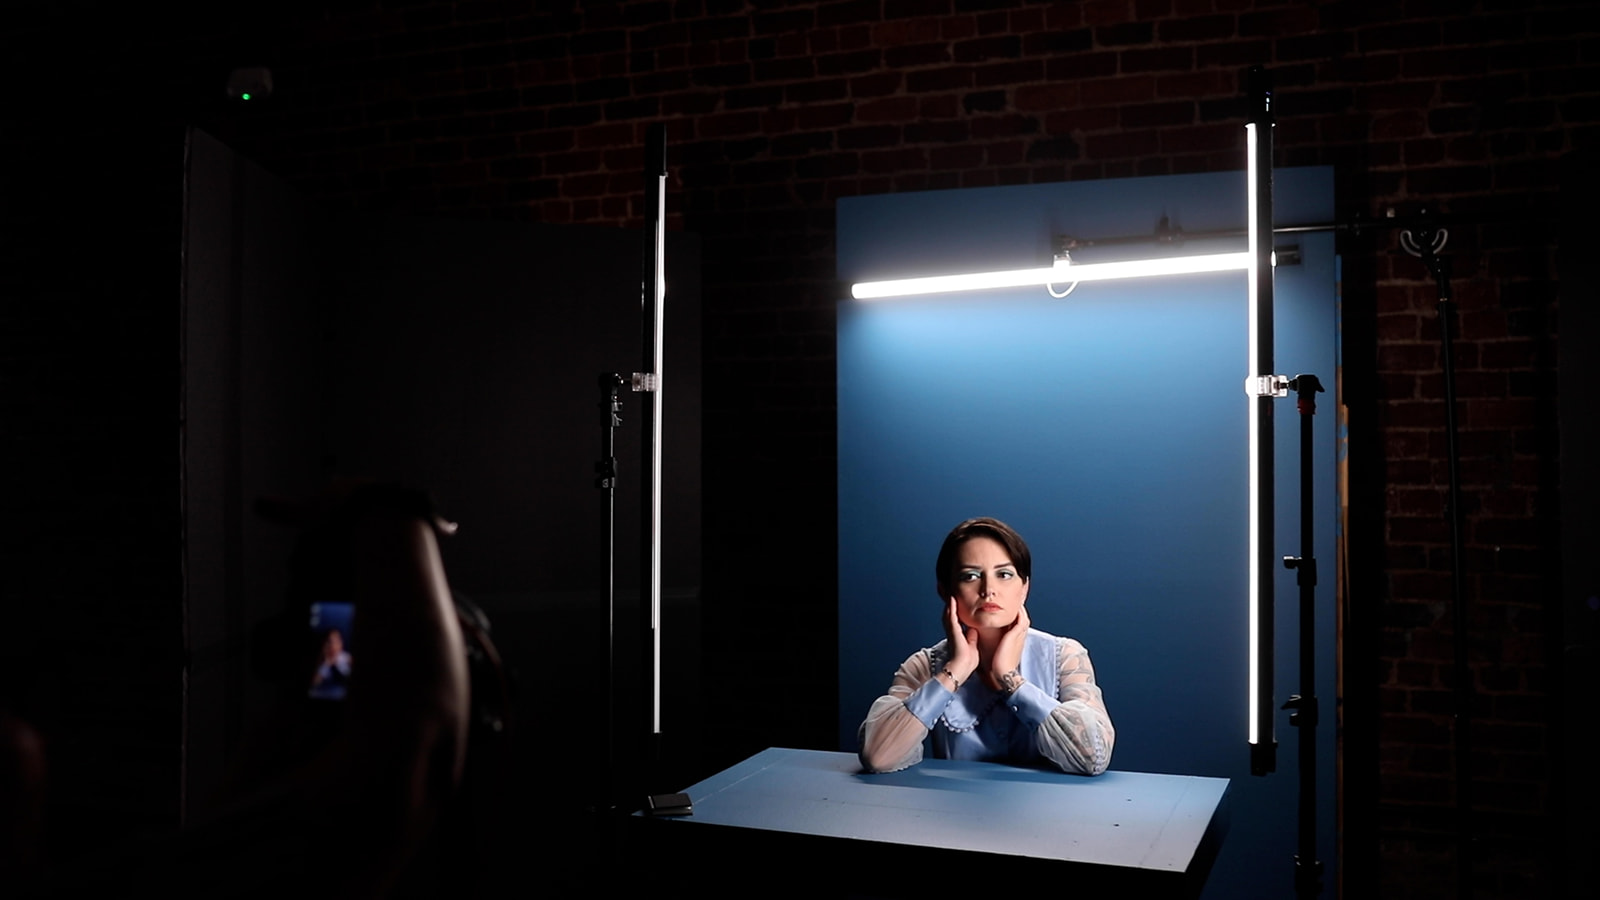
Lighting Setup:
-
Three Godox TL120 RGB Tube Lights
-
Two on either side of Rose, slightly raised
-
One high behind her for rim/separation
-
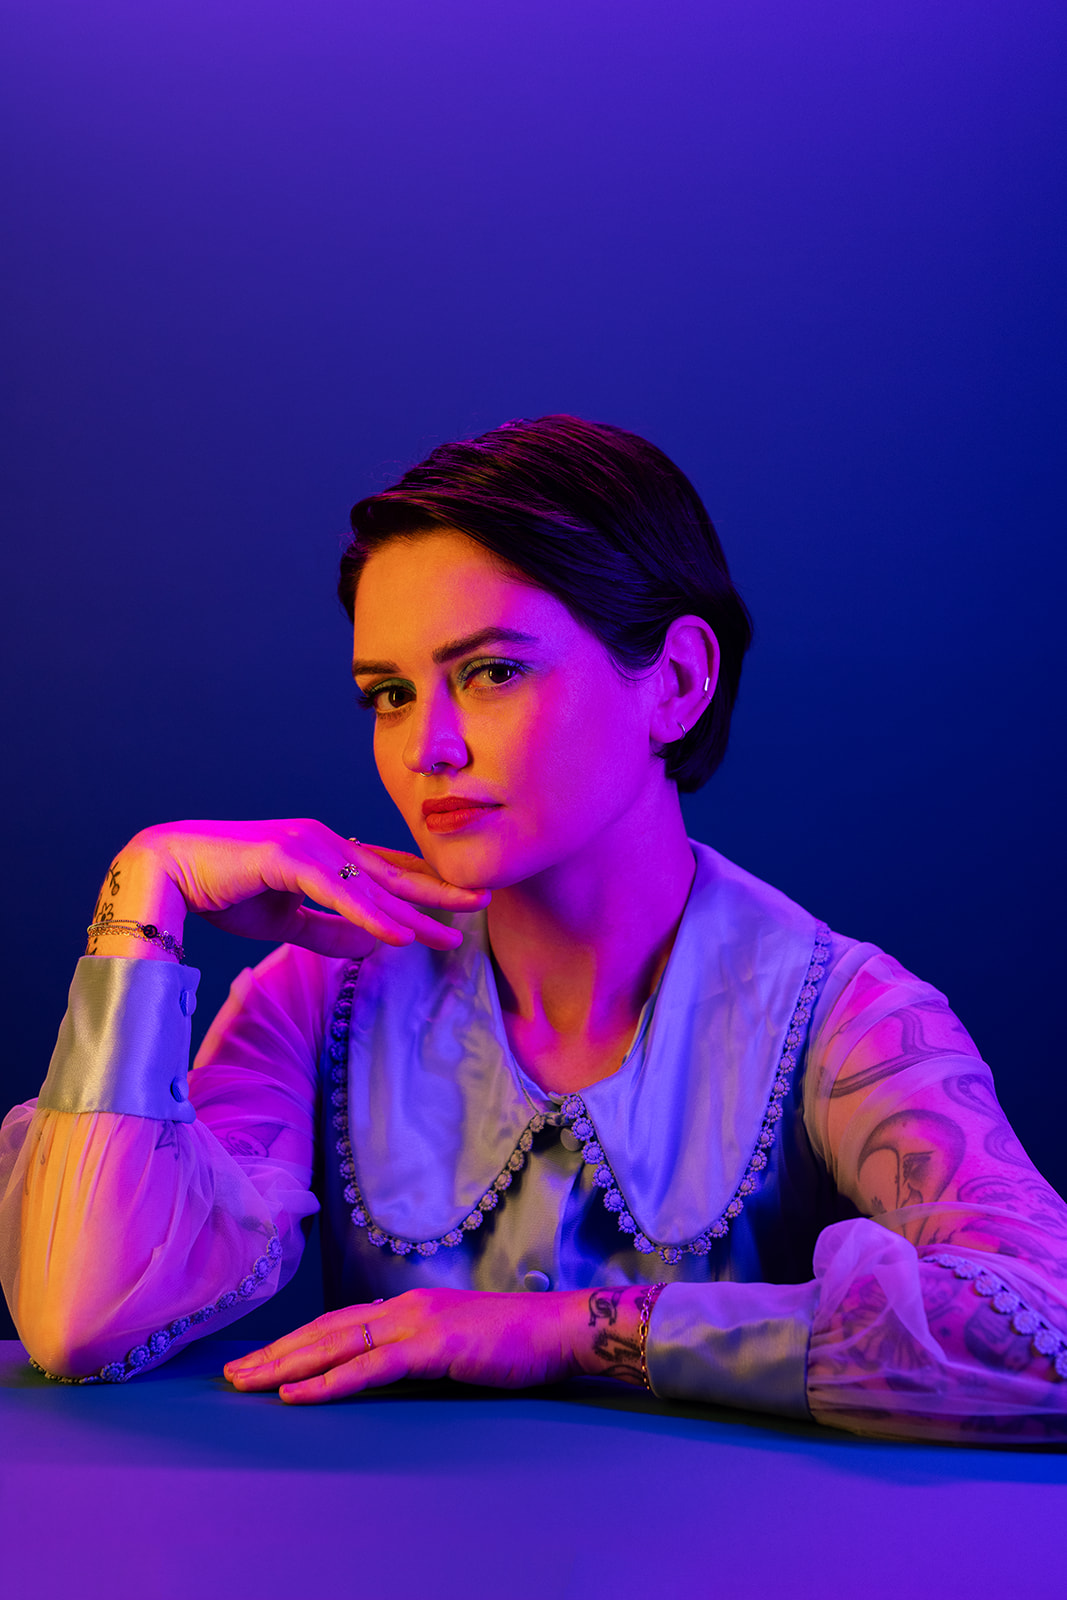
With lights on both sides, those shadows from the first setup disappeared completely, giving us even, high-key light across Rose’s face.
What I love most about this setup isn’t just the light on Rose. It’s what it did for the set. Using a tube light centered on the Hollywood flat created a beautiful gradient from light to dark, which naturally guides the eye toward our subject and adds visual interest. It’s a great reminder to think about lighting the whole scene, not just the person in it.
This produced an even brighter, shadow-free result and added a subtle gradient to the backdrop that drew the eye toward Rose. You can really see the difference in the backdrop in the comparison below.
Playing with Color: LED Tube Lights
One of the coolest things about Godox tube lights is that they are dimmable and RGB, so you can change the brightness, saturation, and even the color. Naturally, we had to play.
We started simple by dimming one side to add subtle dimension, then adding a purple rim light for atmosphere while keeping the fill on Rose’s face white and neutral. The result was a slightly dreamy look that still felt pretty true to life.
Next, we swapped the right-side fill to blue. Mixing colored light with a stronger white light makes the shadows pick up the hue. You can see it on Rose’s cheek and in the backdrop compared to the previous shot.
Then we got creative, experimenting with different combos to push the surreal factor:
• Purple rim + white fill creates a dreamy glow
• Blue fill + white light tints the shadows
• Purple + yellow gives a dramatic, complementary color pop
The key with colored lighting is to experiment, test, tweak, and repeat. It’s a fun, playful way to completely change the mood of your portraits, and it always feels very surreal making it perfect for creative shoots.
Setup 3: Using V-Flats as a Bounce
For this setup, we wanted to play with the light more intentionally by using a V-flat as a giant bounce.
Lighting Setup:
-
The LA300R was placed on one side of Rose and aimed at a white V-flat, bouncing soft light back onto her.
-
We left one TL120 tube behind for a rim and a little ambient fill.

This gave us really soft, even fill without hitting Rose directly. It’s less about the light source itself and more about how the reflected light sculpts the scene.
It’s a great reminder that you can get gorgeous results just by redirecting light with a bounce.
Takeaways
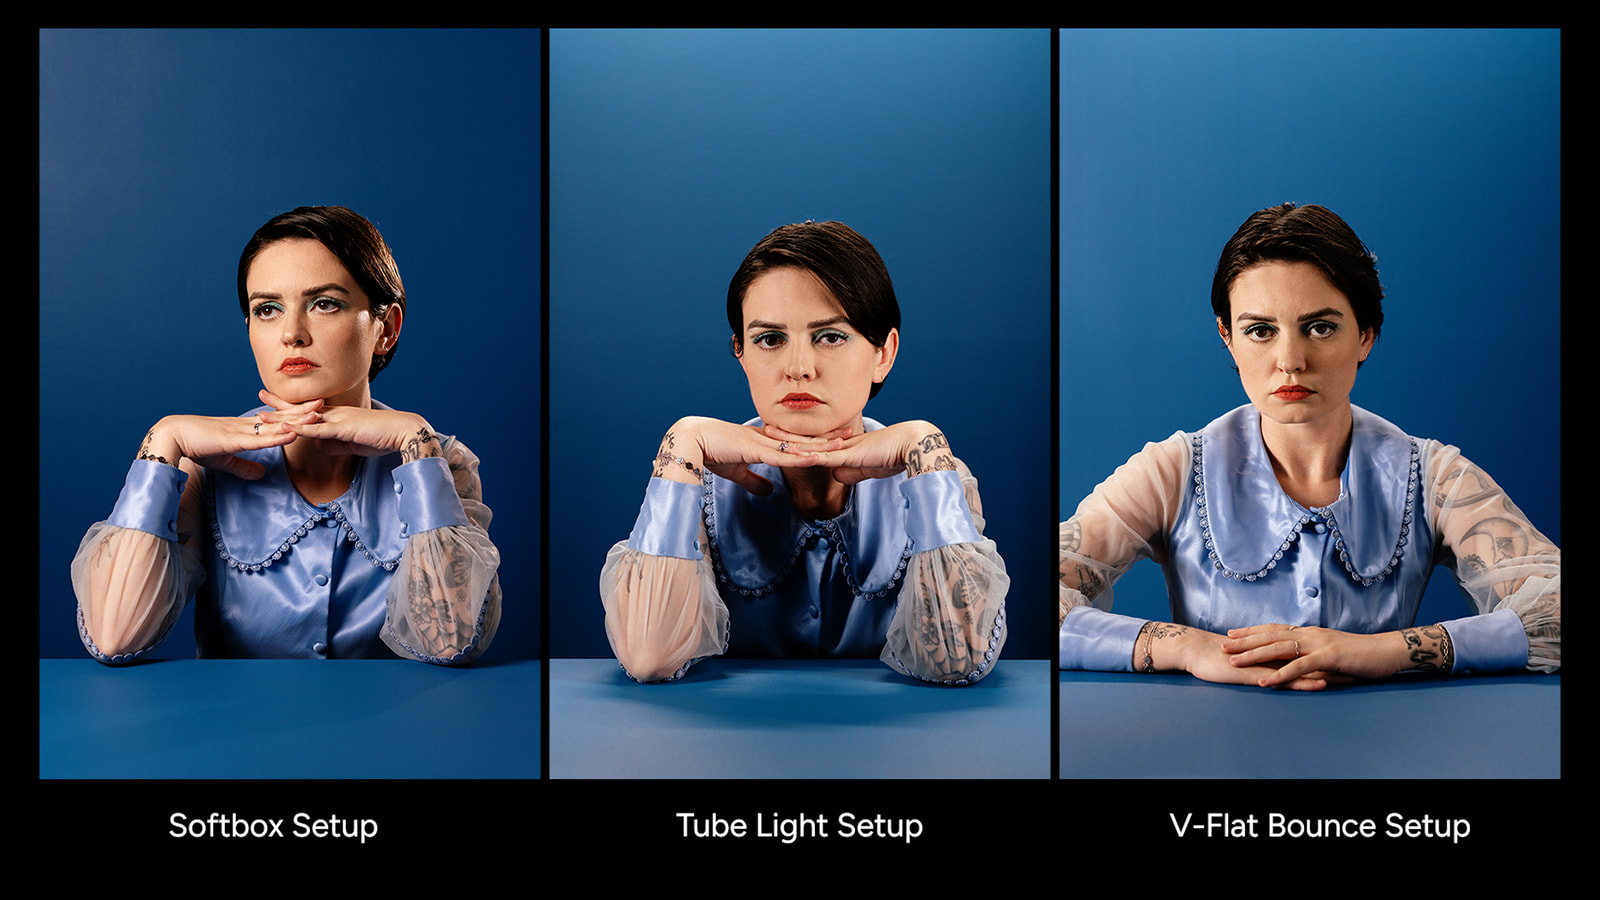
We proved that you can achieve a high-key look in three very different ways using different types of lighting equipment. At the same time, we saw firsthand how much variation you can create within each setup by experimenting with V-flats, modifiers, and colored light.
Three setups. One set. One model. Totally different vibes:
-
Clean, commercial high-key
-
Editorial drama with grids and negative fill
-
Surreal color using RGB tubes
-
Soft, sculpted light from a giant bounce
Lighting isn’t just technical, it’s creative play. Move a modifier, flip a V-flat, or add color light, and your whole image transforms. The best thing you can possibly do with lighting is play and experiment on your own. So, start with one of these setups, and make some adjustments to see what you can come up with on your own.
Make sure to check out the YouTube video for a behind-the-scenes look at creating these light setups.